Please make sure to unzip the package that you downloaded from themeforest, Before uploading it to your WordPress installation as a theme.
Because, It contains many other files & directories like Documentation, Import XML, License, PSDs, Theme Files, Theme Zip, Child Theme Files and Child Theme Zip.
Last Updated: 4th May 2019
Support: Support Site
Developed By: Inspiry Themes
Thank you for purchasing Political Press WordPress Theme . If you have any question that is beyond the scope of this help file, Please feel free to create a support ticket using Our Support Site. Thanks!
Please Rate this Theme
Please remember to rate this theme! To do so, Please go to your Downloads page and click on the star rating in front of this theme! Thanks! View Example Image.How to Get Themeforest Item Purchase Code to Create a Support Ticket
Please visit following Link to learn about how to get item purchase code from themeforest to signup into our support site and create support ticket.
For Existing Users having theme version 1.3x or less.
We have added customizer based settings in this theme. It is highly recommended that you shift on the customizer from theme options panel. The option panel is deprecated and will no longer be updated. It is still the part of our theme for now but in future we will get rid of it.
The migration instructions are given in the theme notification after you update the theme. Please visit our support site in case of any trouble.
A) Disclaimer
We offer limited support for theme customers. We only provide support for our themes and their core features. We cannot guarantee our themes will work properly with all third party plugins and server environments. If you plan on adding numerous plugins to this theme then please note, We cannot facilitate support for any conflicts that might arise with this theme's default functionality. The Political Press WordPress theme is presented as it is.
B) Getting Started (Recommended Quick Setup)
Welcome to Political Press Theme Documentation. In start you must have a working version of WordPress already installed. For information in regard to installing the WordPress CMS, please see the WordPress Codex Installing WordPress
2.1 Install Theme
When you are ready to install a theme, you must first upload the theme files and then activate the theme from Appearance > Themes.
Theme files can be uploaded in two ways:
FTP Upload: Using your FTP program, upload the non-zipped theme folder into the /wp-content/themes/ folder on your server.
OR
WordPress Upload: Navigate to Appearance > Themes > Install Themes > Upload. click 'Choose File', and select the zipped theme folder. Hit “Install Now” and the theme will be uploaded and installed.
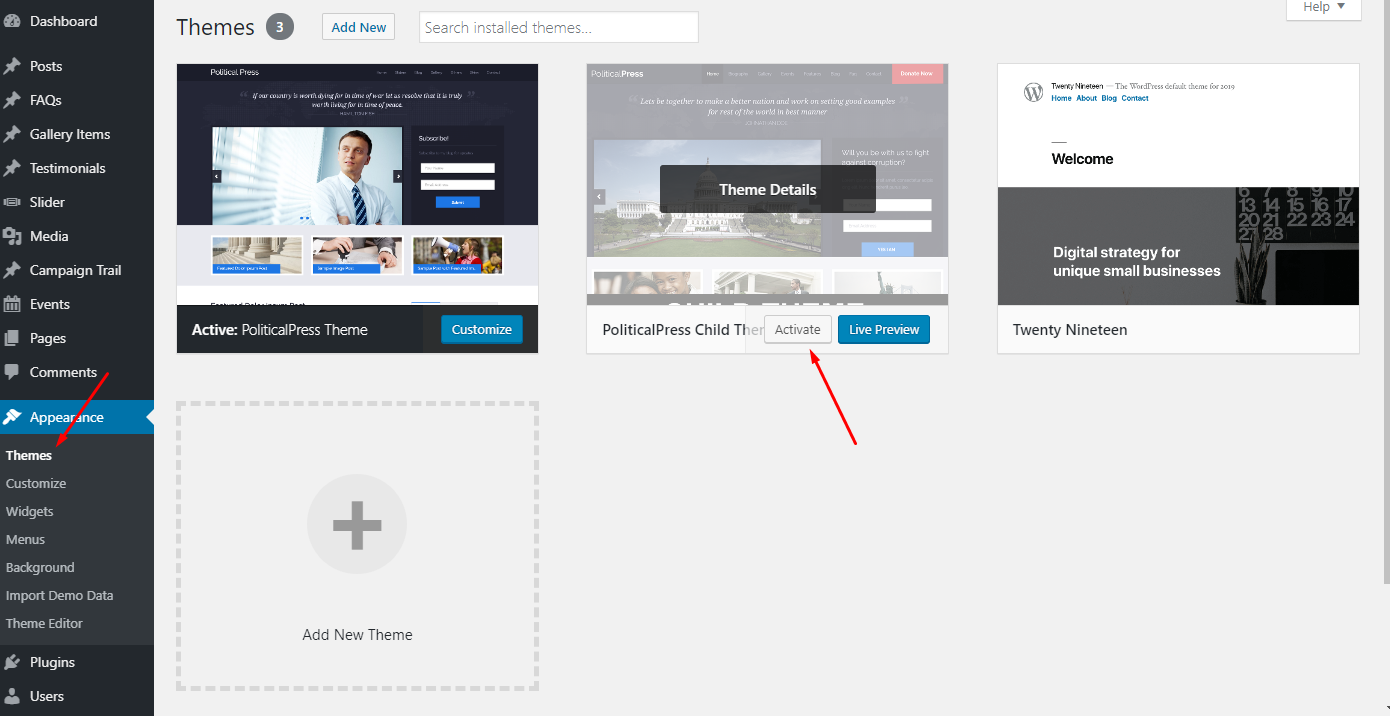
Once the theme is uploaded, you need to activate it. Go to Appearance > Themes and activate your chosen theme.
Note:The Theme zip name is political-press-theme.zip. which you will find in the downloaded package from themeforest
2.2 Install Child Theme
It is better to use child theme and if you need to modify anything you modify in child theme only. This way you can easily update your parent theme when new update becomes available on themeforest. You can read more about child theme from here.
To install child theme, you need to upload the political-press-child-theme.zip and activate it the same way you uploaded political-press-theme.zip as guided below.
Install Plugins
A notice will be displayed right after the activation of the theme asking you to install and activate the required plugins. So, go ahead and click on Begin installing plugins.
One Click Demo Contents Import
We have added One Click Demo in version 1.4 to make it easy for the users to download the demo contents. You can go to 'Appearance > Import Demo Data' to import all the demo contents.
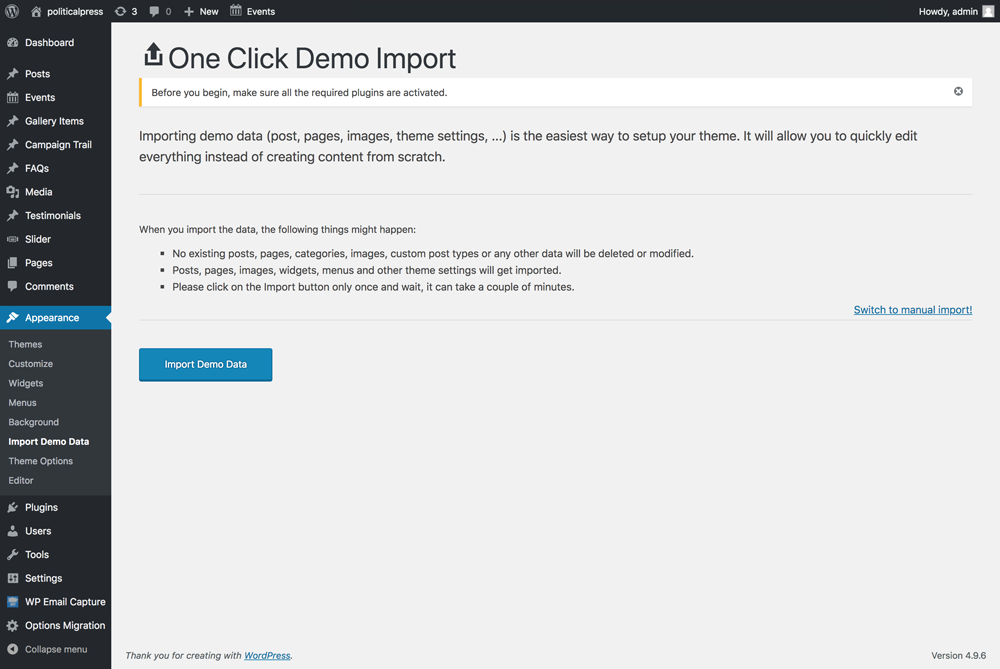
Clicking that button will take some time. After it is finished, it will set your home and blog pages, menus, widgets and all related stuff you can see on our live site.
2.3 Munual Import - Demo Contents
Look for Import XML folder in unzipped package downloaded from themeforest.net and use the XML within it. Go to the WordPress Admin >> Tools >> Import >> WordPress
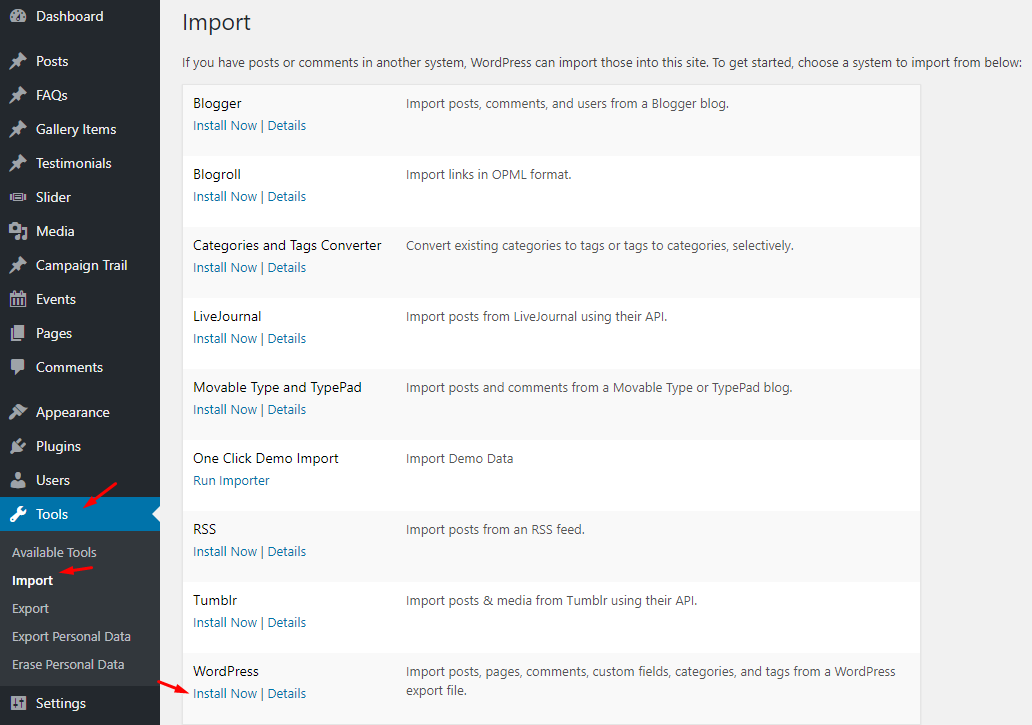
( at 1st time you need to install and then run WordPress import plugin).
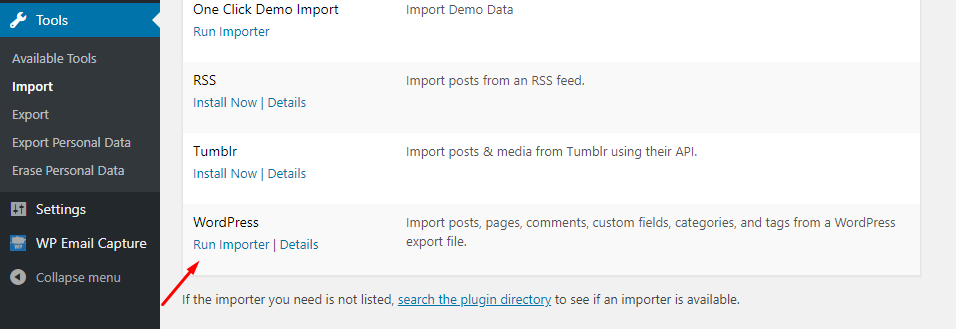
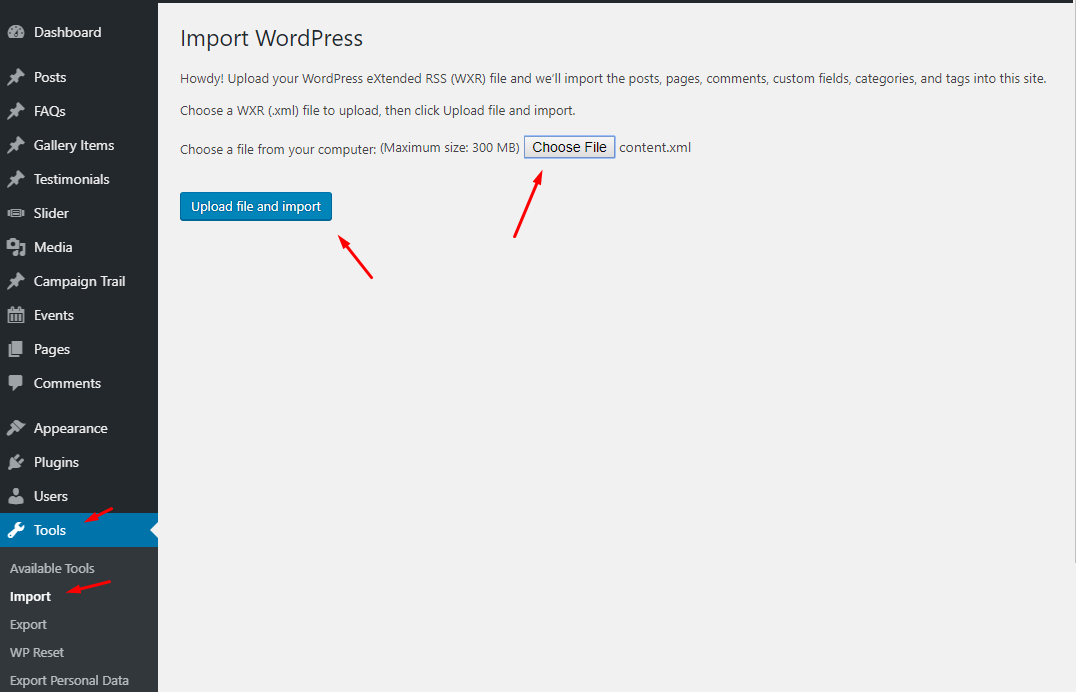
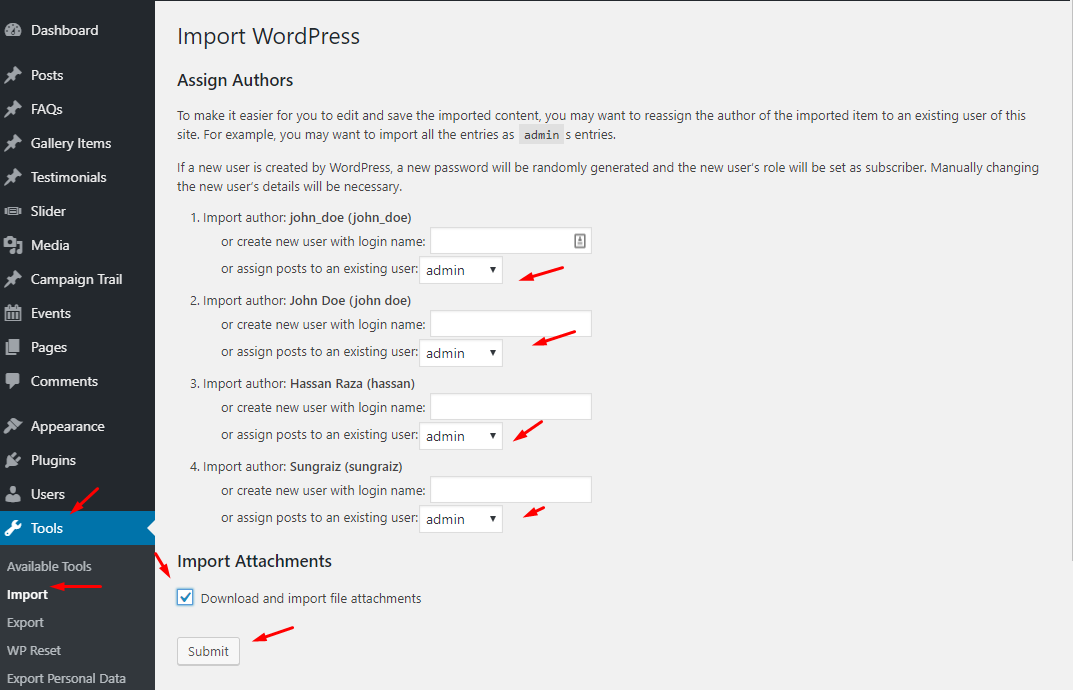
After that, Import the XML file and be sure to include everything, including attachments. After that’s done, you will have a bunch of posts, pages and other related contents. Next step is to configure Menu.
2.4 Configure Menus
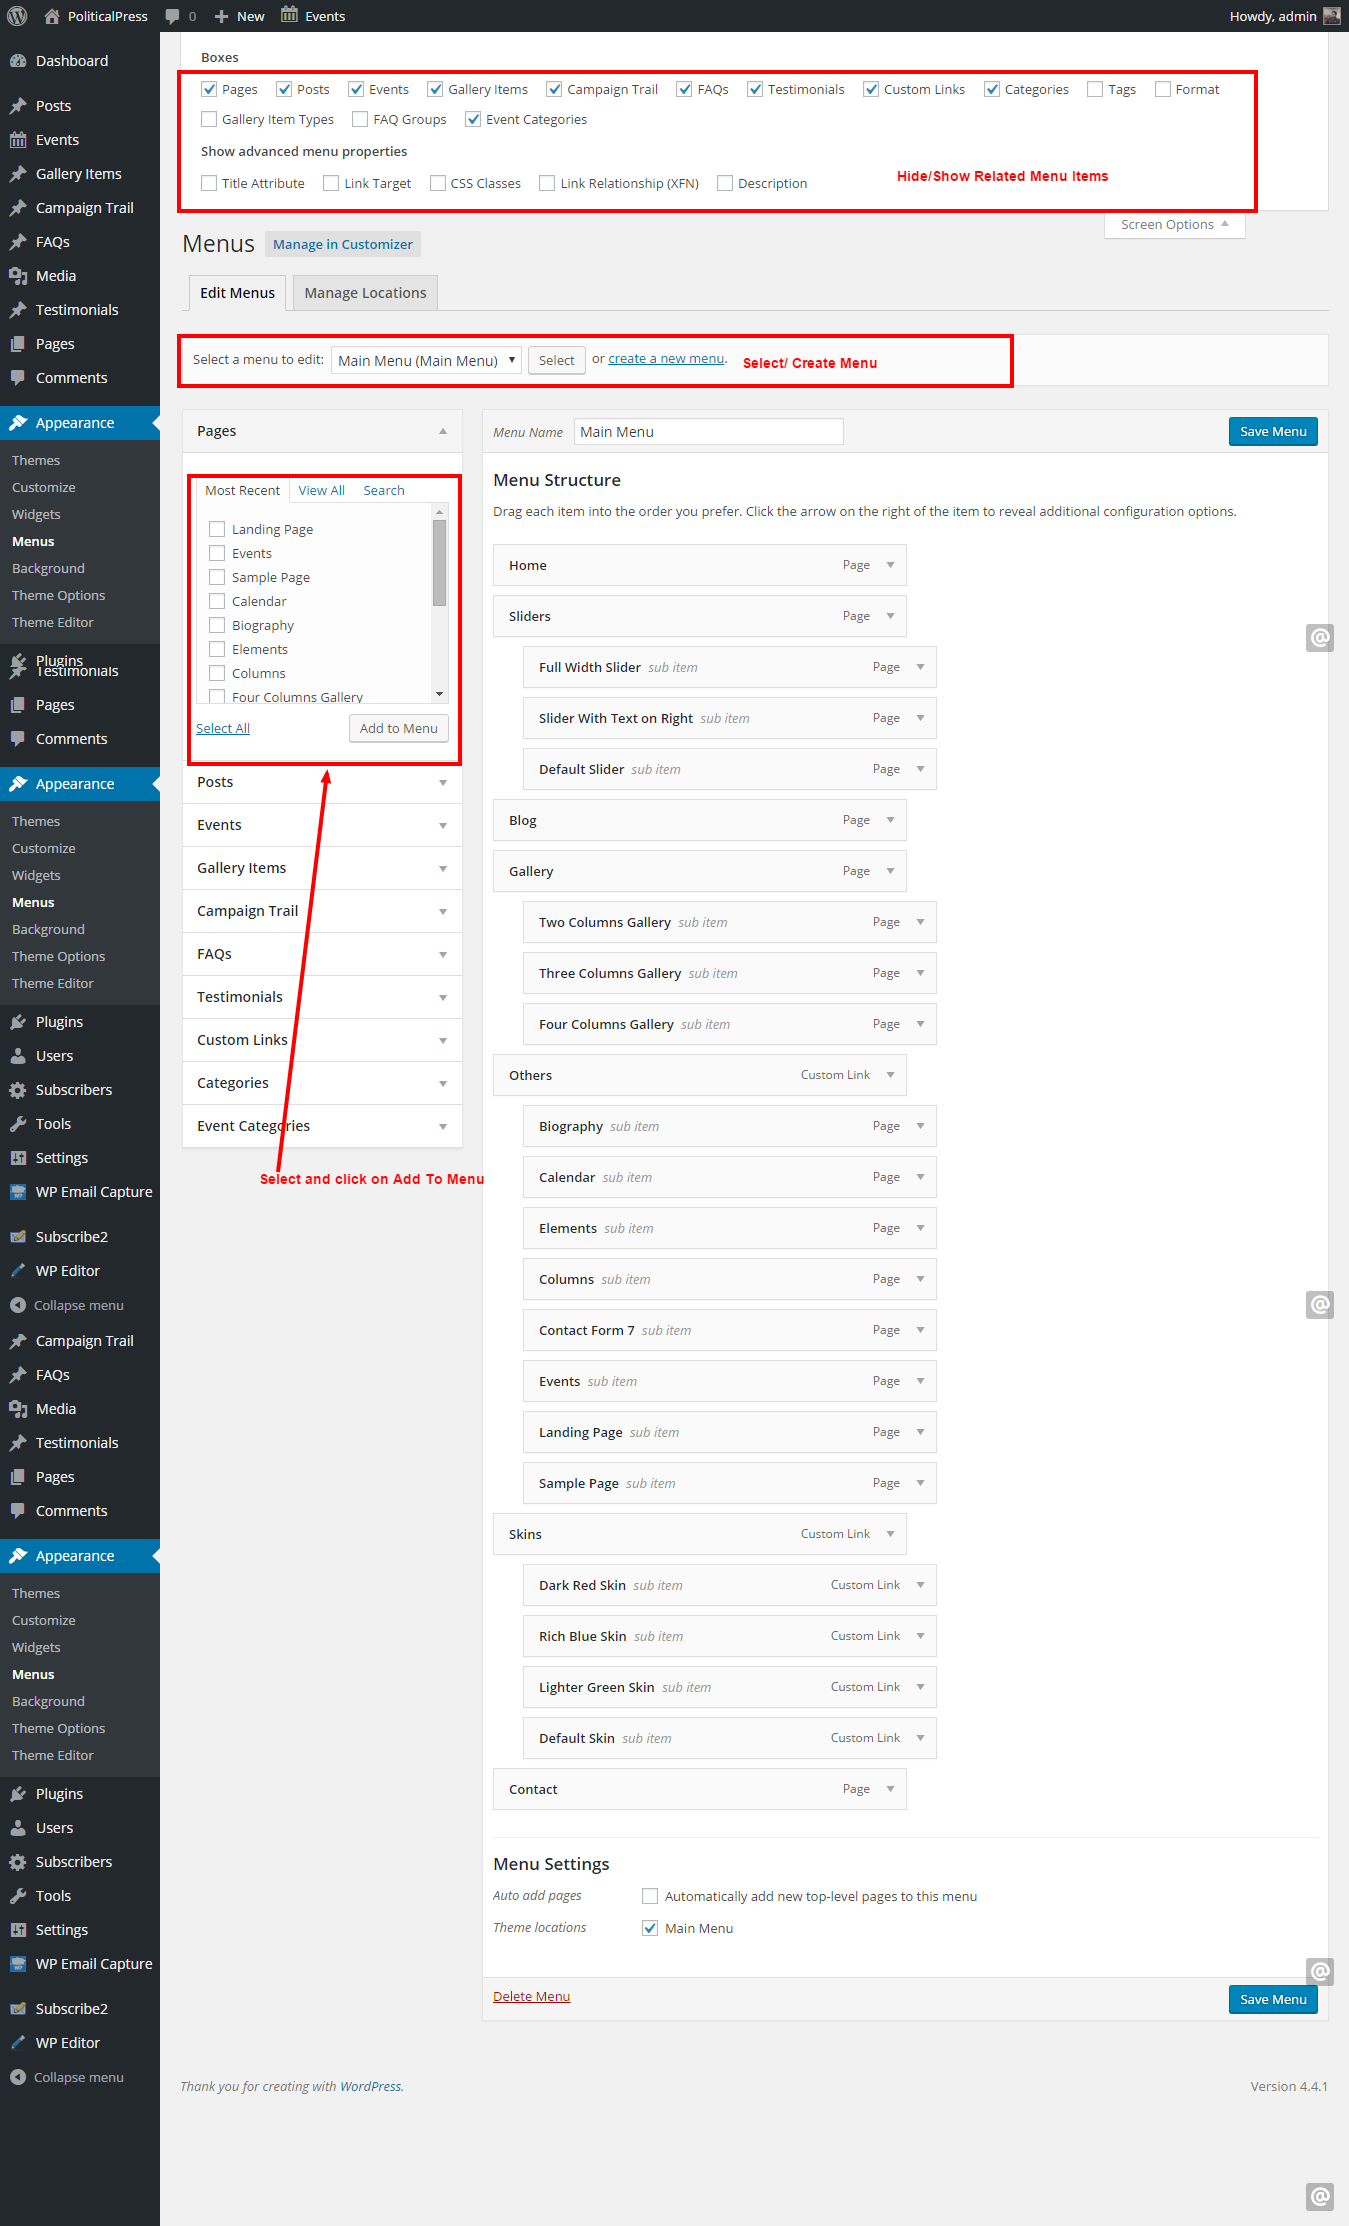
The theme has only one custom menu location, which is named "Main Menu". To setup your custom menus, navigate to Appearance > Menus and use the Already Imported Menu from XML and assign it to theme location "Main Menu" from Menu Settings section below menu.
If you want to build your own menu then, Provide your menu name and build it up using the available widgets. To extend the available widgets, click the screen options tab at the very top-right of the screen and configure your options. Once you have built your menu, save it and assign it to "Main Menu" Theme location from Menu Settings section below menu.
1.2.2 updated functionality
In some cases people needs to option dropdown menus to the left instead of right side. As menu of this theme is on far right so dropdown menu on the right might get hidden on smaller or fit screens. To fix this issue i have provided 'left-flow' class for the menu. You can enable CSS classes from 'screen options' on the top right of menu admin settings page. Give 'left-flow' class to the menu and its dropdown menus will open the the left instead of right side.
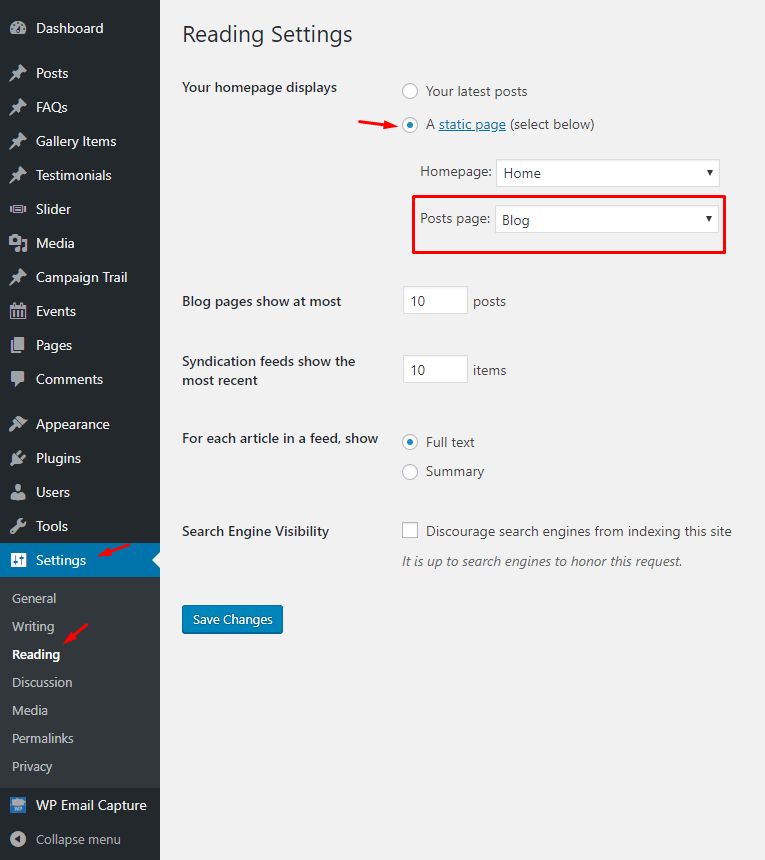
2.5 Configure Reading Settings
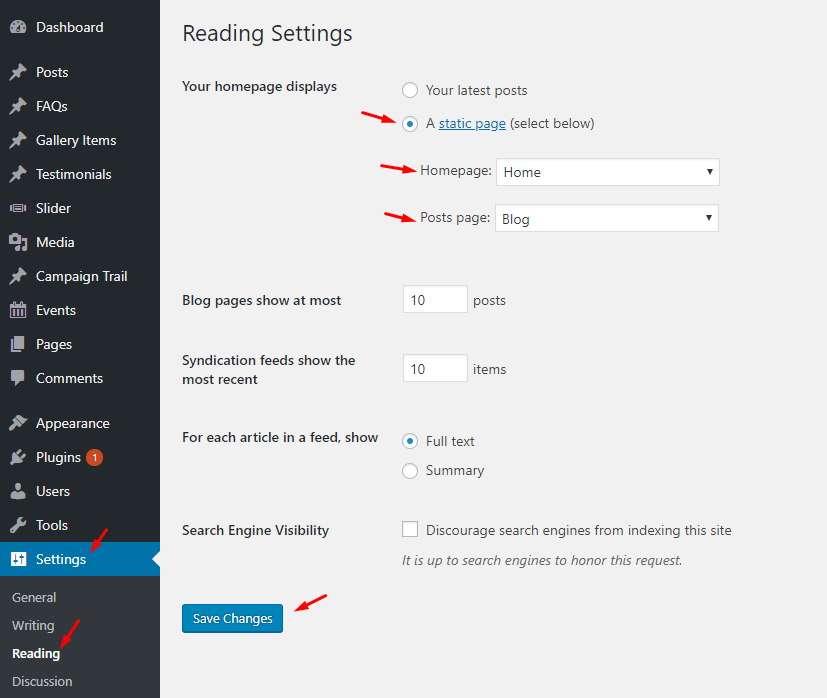
To setup Home and News page you need to visit WP Admin >> Settings >> Reading and setup Home as Front Page and News as Posts Page. As, displayed in image below.
After that you can change the Number of posts to show on News page and save the changes
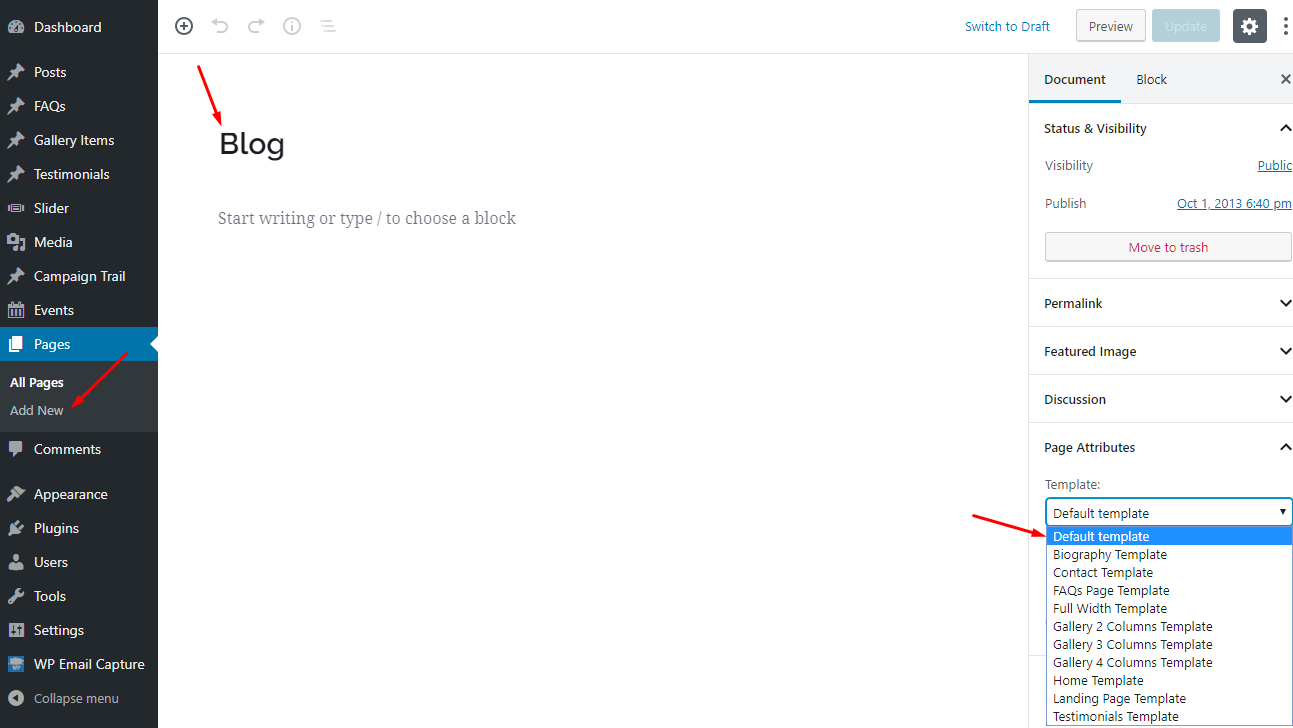
2.6) Setting up landing page
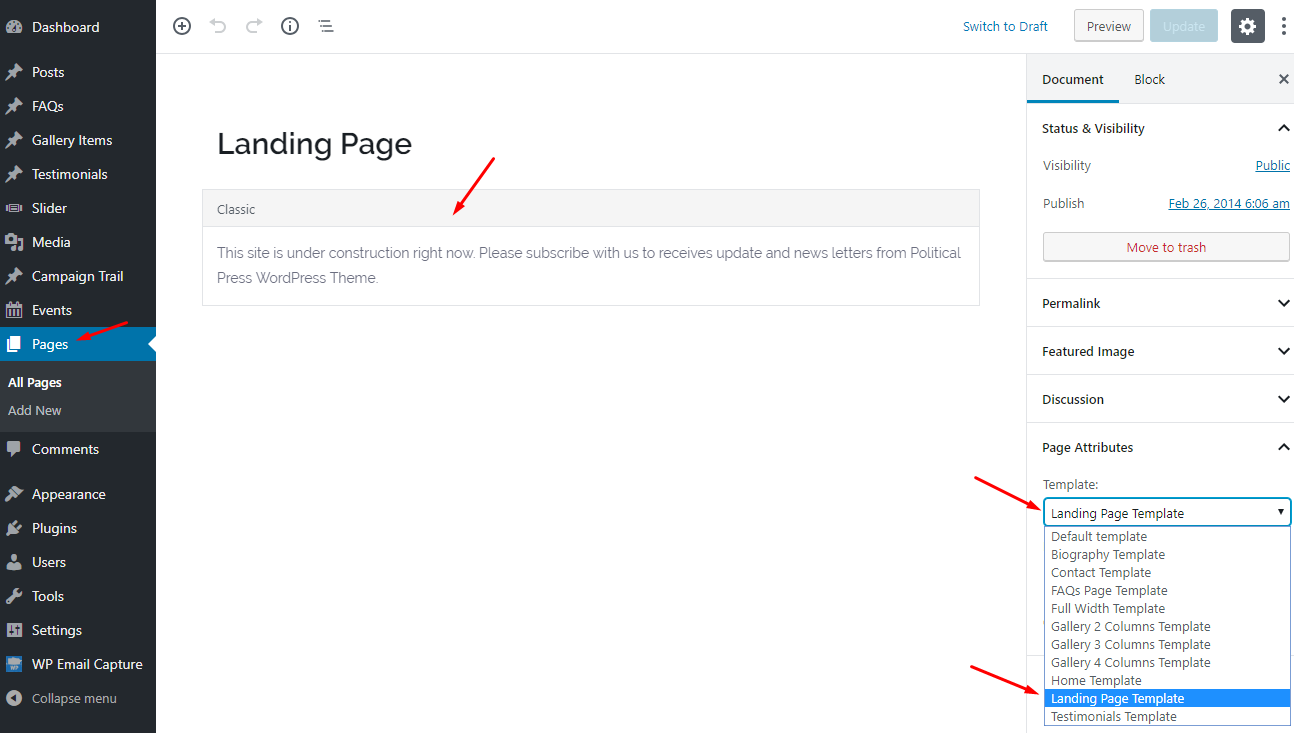
To set up the Landing page you need to create a new page (In case of imported XML the page is already created), you can do so by navigating to Pages > Add New. You can give this page a title "Landing Page". You can include contents in here line a statement about launching your website or subscription request etc. Select the “Landing Page” template from the Page Attributes section and click “Publish”. As, displayed in image below.
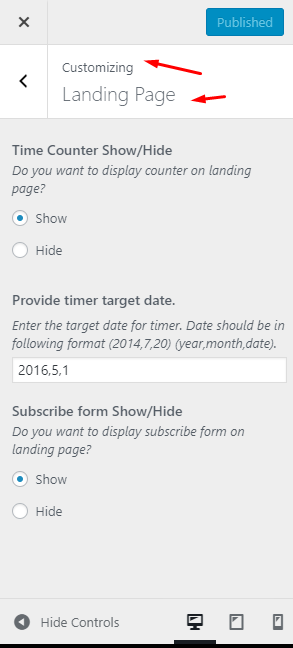
This theme offers landing page for new website with days counter and subscribe area. You can manage your landing page options from theme customizer. Go to Appearance > Customize > Landing Page.
3.2.1 Days Counter
If you want to show days counter on your landing page then select show from the first option. Provide target date for your website launch. Date format is mentioned in front of that text field.
3.2.2 Subscribe Option
You can place a field for users to subscribe so you can let them know when your site is up and also you can send them newsletters. To have that functionality you have to install a plugin named 'Simple Subscribe'. Install that plugin by following same process from above. If plugin is installed then subscribe form will appear on the landing page if you have selected yes on second option.
C) Setting up Homepage
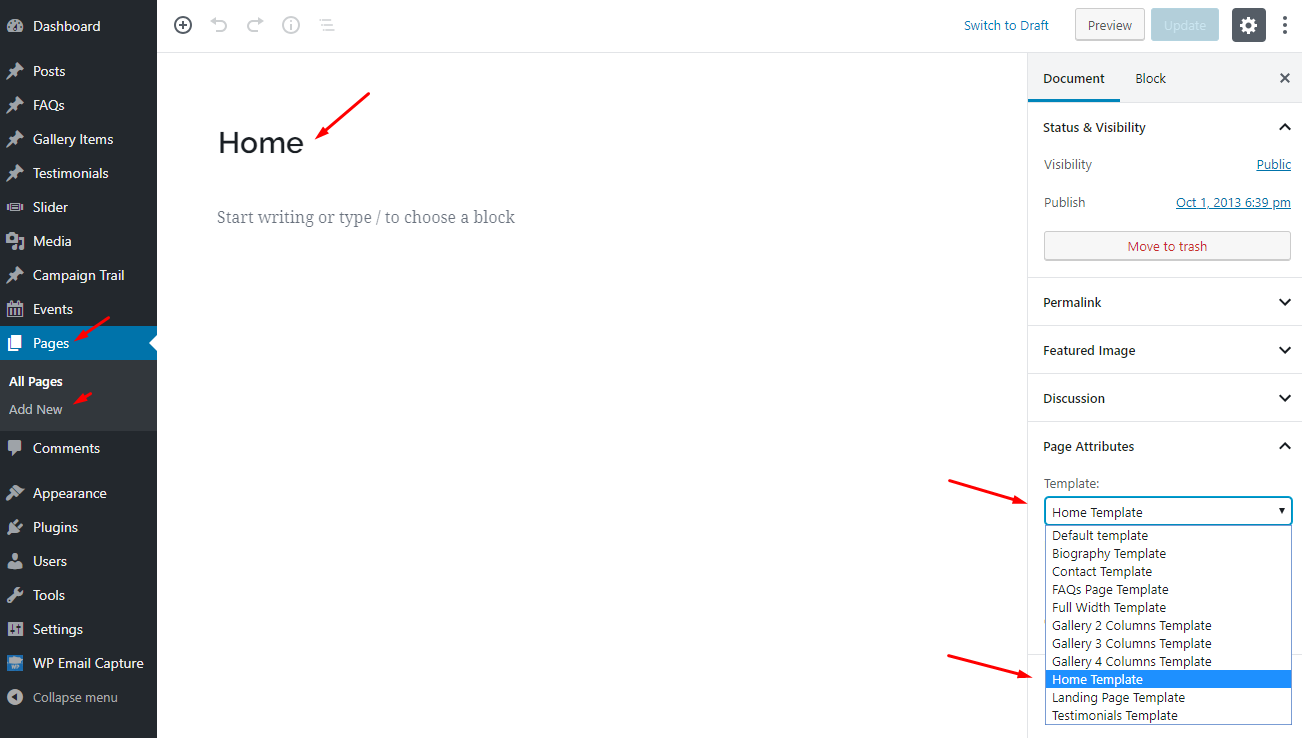
To set up the Homepage you need to create a new page (In case of imported XML the page is already created), you can do so by navigating to Pages > Add New. You can give this page a title "Home" yet you do not have to include any contents for now. Select the “Home Template” template from the Page Attributes section and click “Publish”. As, displayed in image below.
Once you have created your homepage navigate to WP Admin >> Settings >> Reading and configure the “Front Page Displays” setting. Select the static page option and choose the page you just created as your front page. As displayed in image below.

You can configure further Homepage related options from Customize >> Home Page
3.2) Homepage Options
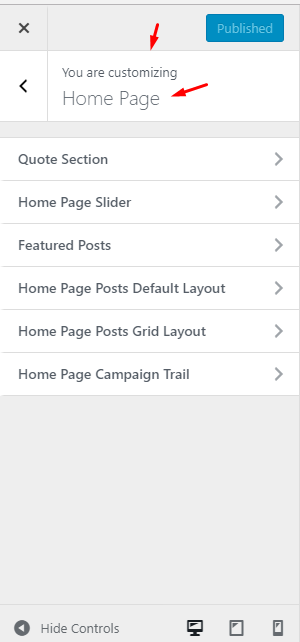
You can manage your home page from customizer. Go to Appearance > Customize > Home Page.
3.2.1 Quote Section
If you want to place a quote on your home page then you have to provide it in given textarea under 'Quote' heading. You can also mention name of quote author in given field after it. If you do not want any quote on home page then leave these fields empty.
3.2.2 Home Page Slider
There are three kind of sliders available in this theme. Slider with membership form on the right. A slider with description of each slider on the right and full width slider. You can see Slider types available after quote options. Select your required slider from the given radio buttons and then click on Add New Slide button to add slides for it. Add a title for the slide and then upload image for it. Required image sizes are mentioned on the right side of these options. You can add Link URL for each slide to redirect visitor and you can add description for each slide which will be visible in second type of slider.
3.2.3 Featured and Default and Grid Layout
After slider options you can see options for listing your posts in different types of variations. You can manage viewing featured posts under home page slider by selecting Yes or No in Featured posts display option. If you want to show these posts on mentioned place then select Yes and then select Tag from the list given under this option. Three posts from selected tag will be shown under slider.
After featured posts you can see post listing options for home page content area. First you can see posts listing options for default layout. You can list these posts based on a tag or a category or just recent posts. Select your required option from radio buttons and then select number of posts you want to list in this layout.
Second type of listing is Grid Layout. Select Yes if you want to use this view of post listing, select posts from options and select number of posts same as above.
3.2.4 Home Page Campaign Trail
To show campaign trail on home page select Yes from display campaign trail option. You can select campaign trail position from two available position. You can show it below the header or above footer. Select the option suited you most and then provide title text for your Campaign Trail in last field.
3.3) Setting Subscribe Email Widget
On the right side of standard slider you can see subscription form which is based on a plugin named "WP Email Capture".
In Settings Menu you can see additional option WP Email Capture. You can see plugin settings page by clicking on this option. Fill the form with required information. Follow screenshot given below.

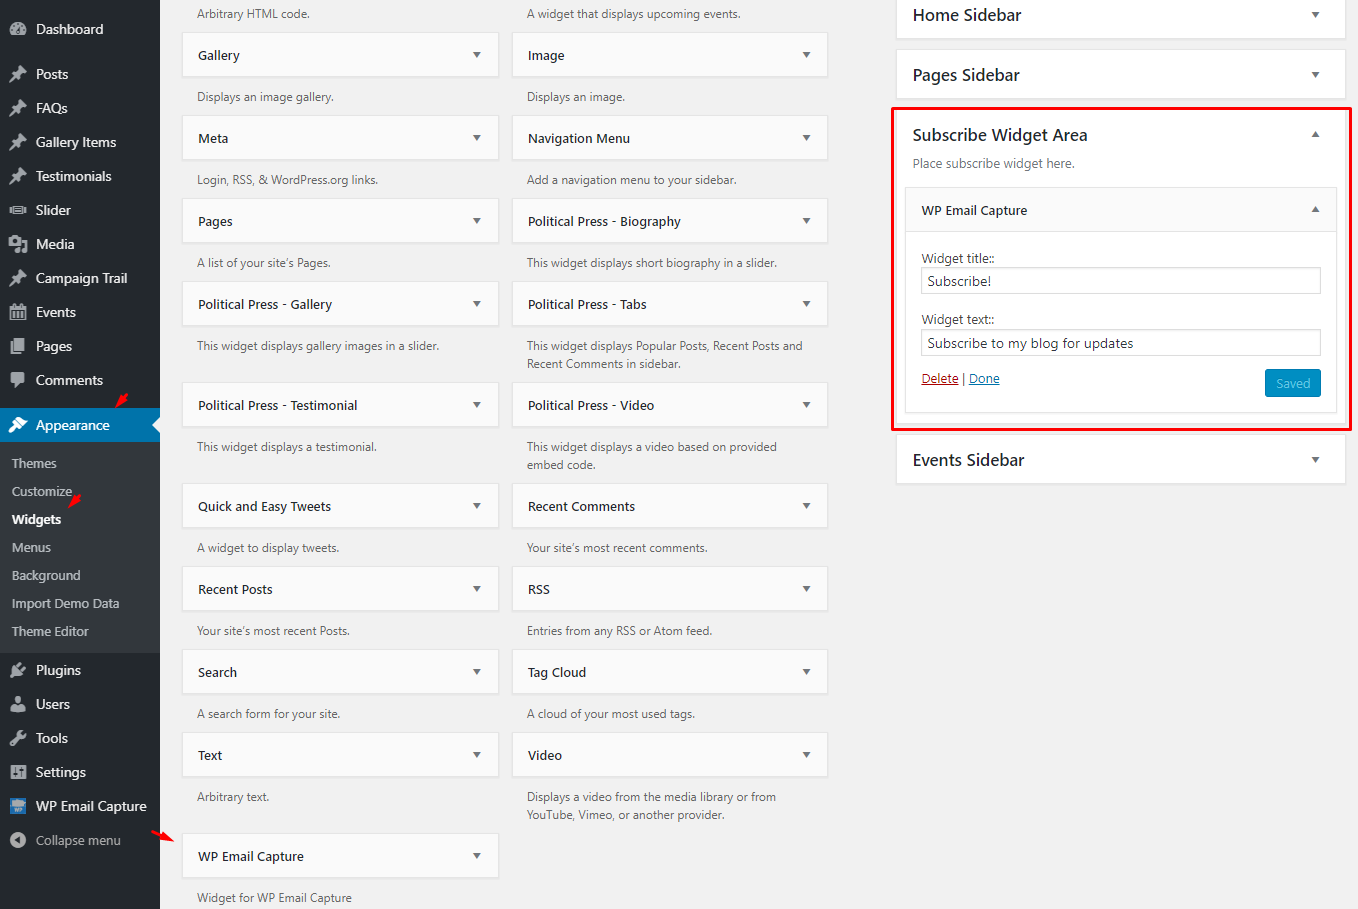
After installing and setting up the widget, go to Appearance > Widgets and insert 'WP Email Capture' widget in Subscribe Widget Area in widgetized areas available on right side. Provide a title and text for your widget. Follow screenshot given below.
3.4) Setting Campaign Trail
Campaign trail is to show step by step progress of the events based political progress or things like that. You can add event in campaign trail by clicking Campaign Trail > Add New in left side menu. Provide required information as mentioned in following screenshot.
You can see out put results on our live demo home page at the bottom. Don't forget to enable campaign trail from Appearance > Customize > Home Options and select its position according to your needs.
D) Setting up Blog or News Page
To set up the blog/news you need to create a new page (In case of imported XML the page is already created). you can do so by navigating to Pages > Add New. You can give this page a title of “News” yet you do not have to include any content. Click “Publish”.
Once you have created your news page, navigate to Settings > Reading and configure the “Front Page Displays” setting. Select the static page option and choose the page you just created as your posts page. Your News page is now created and can be viewed by visiting the page you just published.
4.1 How to add new Blog Post (Format image, Standard)
To add new blog post, Navigate to Dashboard >> Posts >> Add New. Further guide is provided in image below.
4.2 How to add new Gallery Post
To add new blog post with Gallery Post Format, Navigate to Dashboard >> Posts >> Add New and select Gallery from Format widget in right sidebar. Further information is provided in image below.
4.3 How to add new Video Post
To add new blog post with Video Post Format, Navigate to Dashboard >> Posts >> Add New and select Video from Format widget in right sidebar. Further information is provided in image below.
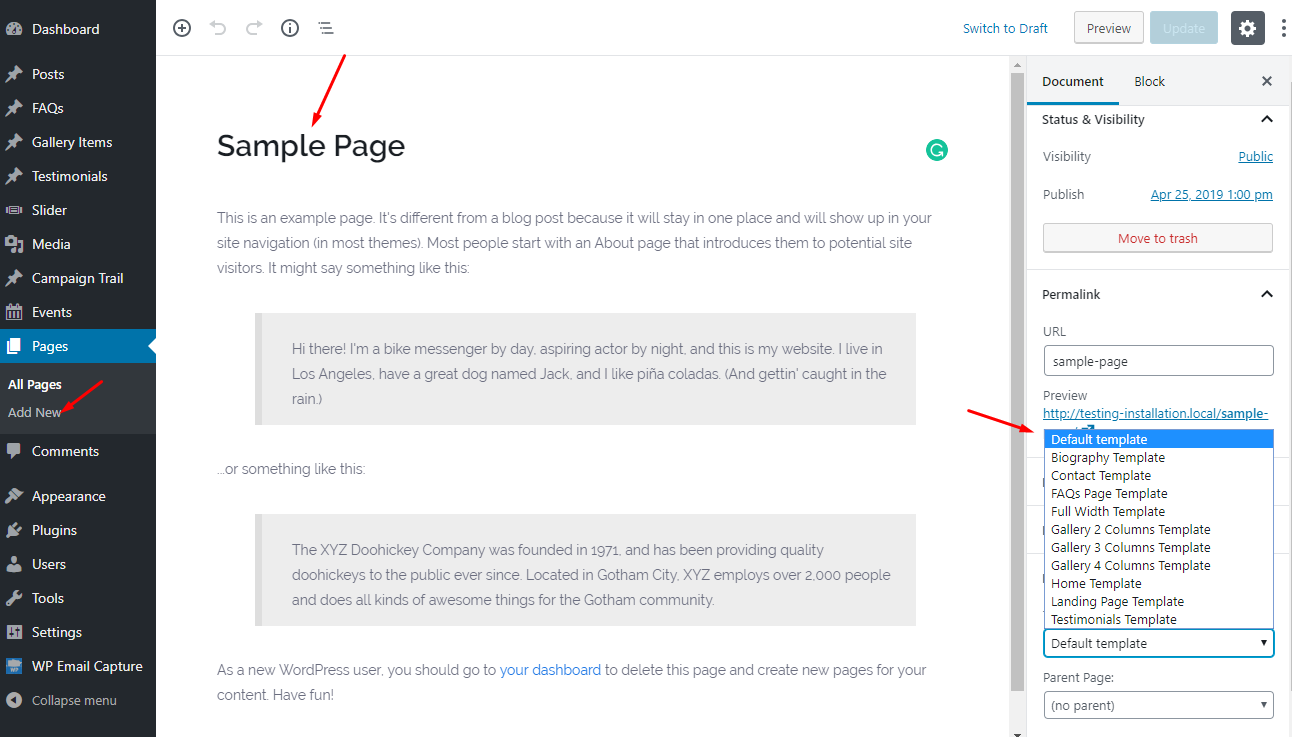
E) Setting up Default Page
Create a new page and assign it Default Template.
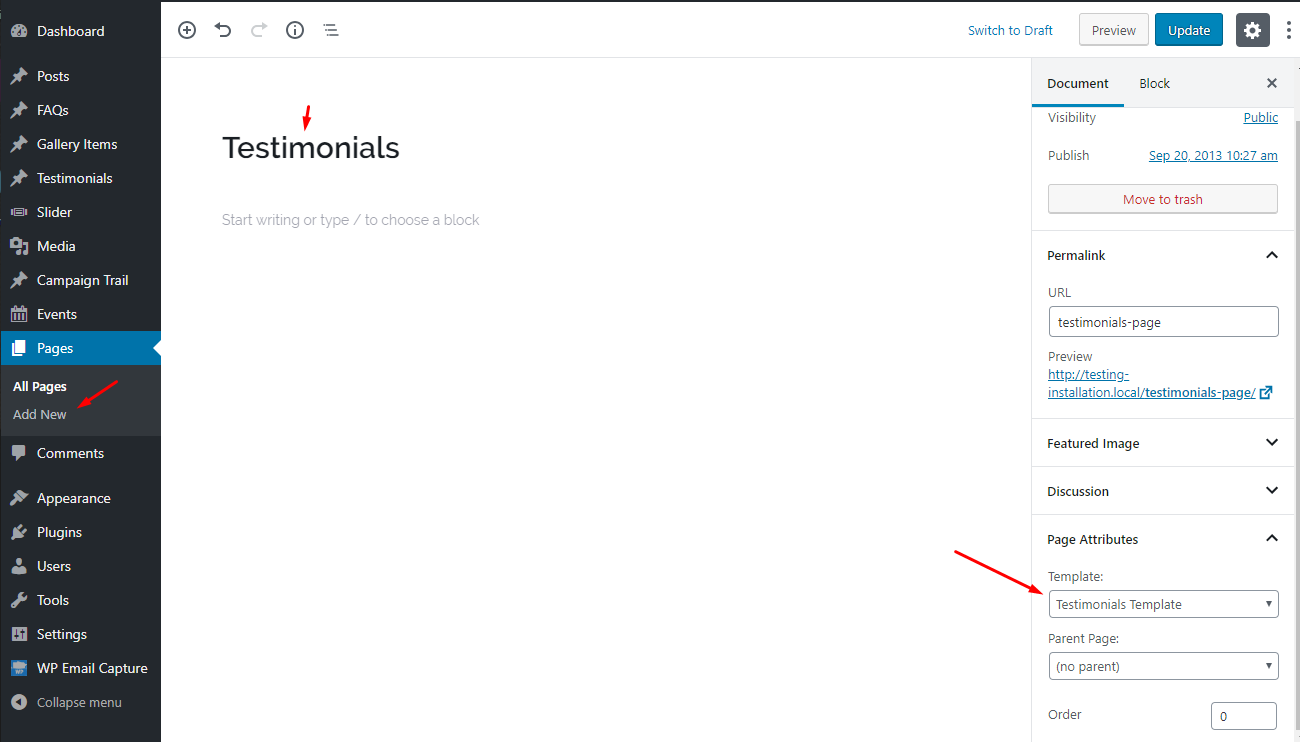
F) Setting up Testimonials Page
Political Press Theme has a Testimonials post type in which you can add testimonials you have received from other people. You can add new testimonial post by clicking on 'Testimonials > Add new' option.
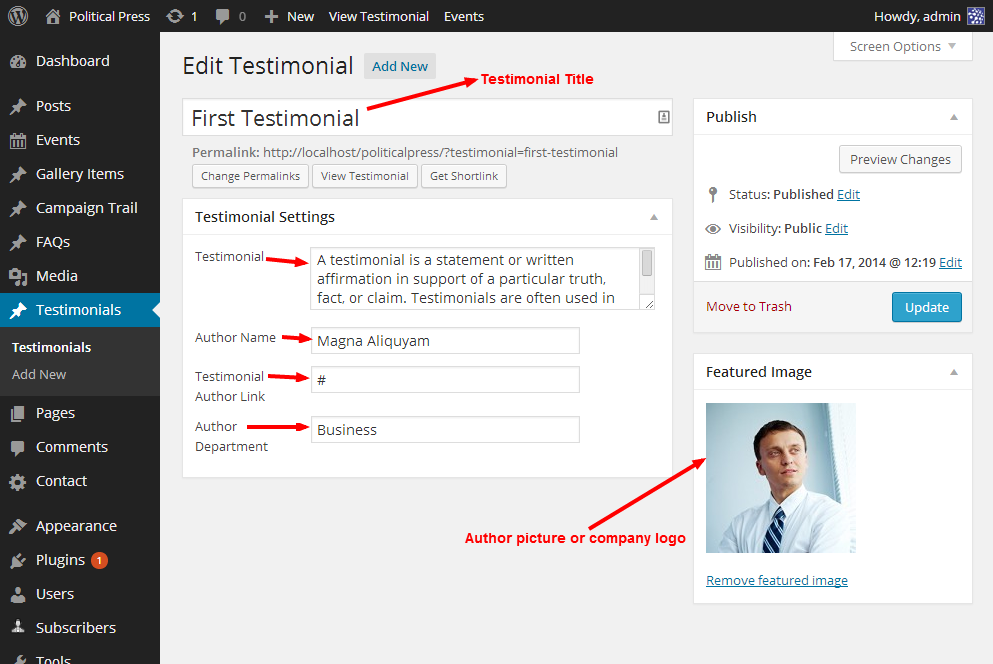
To list all of your testimonials on a page you need to just create a new page and assign it Testimonials Page Template. More information is provided in screenshot given below.
G) Setting up Contact Page
Political Press Theme has a contact Template and options in Customizer panel to help you setup a contact page like the one you can see here.
So, you need to just create a new page and assign it Contact Template. More information is provided in screenshot given below.
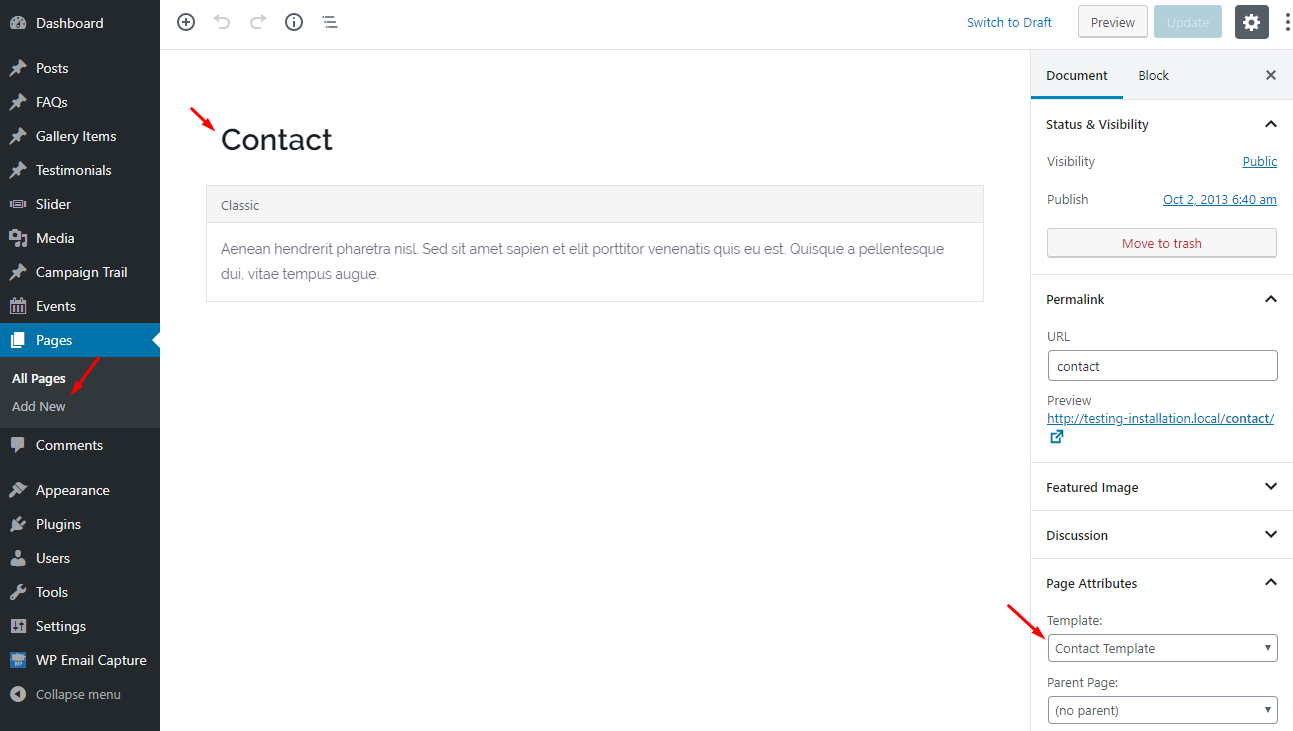
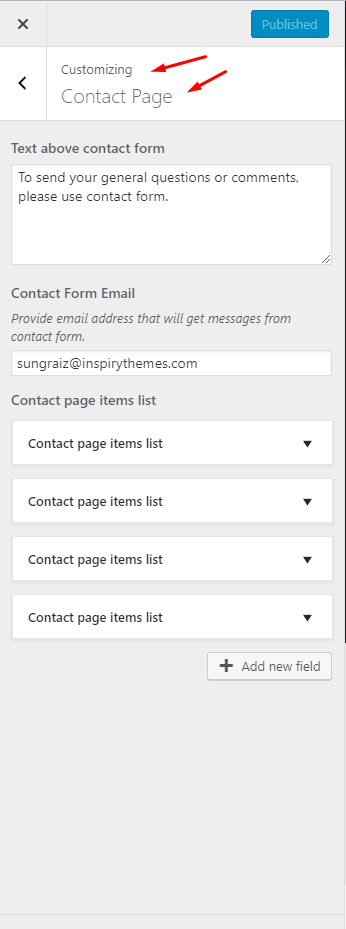
After creating the page you can setup your contact page customizer options.
H) Customizer Settings
You can configure theme related options by navigating to Appearance > Customize. The options are conveniently spread over a number of tabs and each tab contains the options that relates to a particular area of the theme.
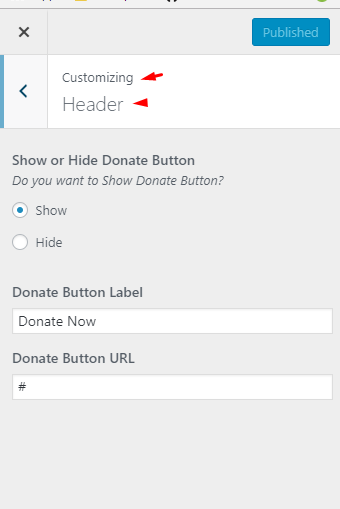
7.1 Header Settings
To configure header from customizer you have to navigate to Appearance > customizer. Here you can see first tab Header on the left column and its options on right side. As displayed in image below. The options are pretty much self explanatory.
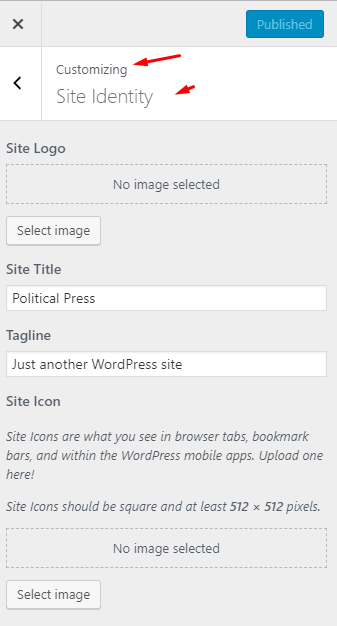
a) Logo: Upload logo for your Website.b) Favicon: Upload a 16px by 16px PNG image that will represent your website favicon.
c) Donate Button: Show or hide donate button from header.
d) Donate Button Label: Give your donate button a label.
e) Donate button Link: Provide a link url for your donate button.
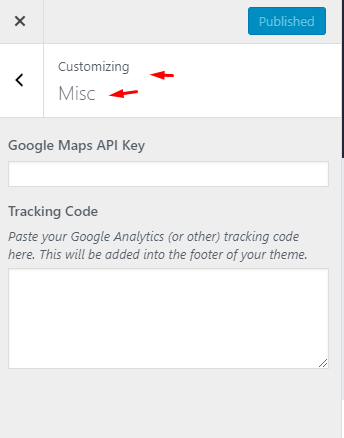
f) Tracking Code: Paste Google Analytic (or other) tracking code here.
7.2 Home Options
a) Quote: Provide a quote to show on home page before Slider.b) Quote Author: Provide an author name for your quote.
c) Sliders: Select slider suitable to your requirements from given options.
d) Slides: Add slides for your selected slider.
e) Featured posts: Featured posts under slider display control.
f) Featured post tag: Select tag for your featured posts.
g) Default Layout of posts: Default layout of posts display control.
h) Number of posts for default layout: Select posts number you want to show in this area.
i) Recent posts grid layout: Recent posts Grid layout display control.
j) Number of posts for grid layout: Select posts number you want to show in this area.
k) Campaign Trail: Campaign Trail display control.
l) Campaign Trail Position: Select a position for your campaign trail to display on from given options.
m) Campaign Trail Title: Provide a title for your campaign trail.
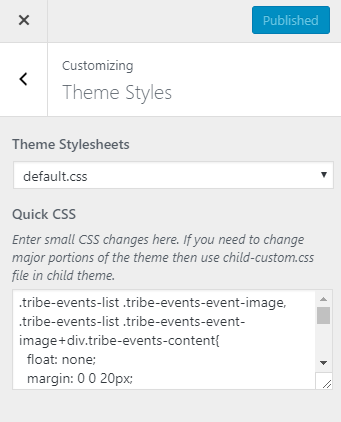
7.3 Styling Options
a) Theme Skins Stylesheets: Select color scheme from available options.b) Quick CSS: Just want to do some quick CSS changes? Enter those here, those will be applied to the theme.
7.4 Contact Options
a) Text above contact form: Provide text to display before your contact form.
b) Target email address: Provide an email address that will receive email from contact form.
c) Contact page list items: Add list items to show on the right side of your contact form.
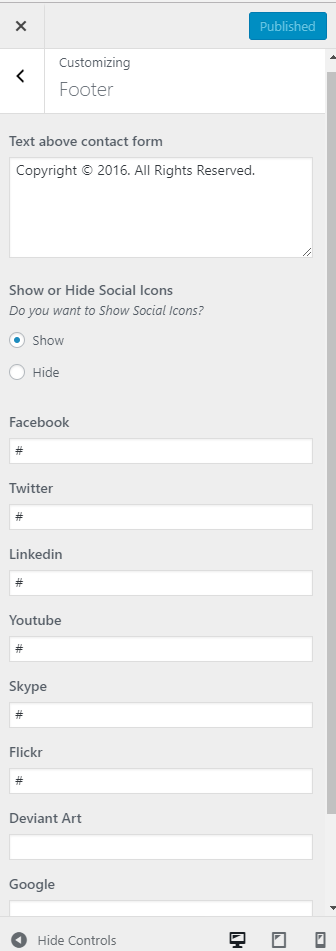
7.5 Footer Options
a) Copyright Text: Provide copyright text to display in footer.
b) Show or hide footer social icons: Control the display of your footer social icons.
c) Facebook: Provide Facebook URL to display its icon in footer social icons.
d) Twitter: Provide Twitter URL to display its icon in footer social icons.
e) Linkedin: Provide Linkedin URL to display its icon in footer social icons.
f) Youtube: Provide Youtube URL to display its icon in footer social icons.
g) Flickr: Provide Flickr URL to display its icon in footer social icons.
h) Skype: Provide Skype Username to display its icon in footer social icons.
i) Deviant Art: Provide Deviant Art URL to display its icon in footer social icons.
j) Google Plus: Provide Google Plus URL to display its icon in footer social icons.
k) StumbleUpon: Provide StumbleUpon URL to display its icon in footer social icons.
I) Theme Features
This section will document theme features and how to use them successfully.
8.1) Custom Widgets
The theme comes with 4 custom widgets that can be used to configure how your site displays content - the widgets can be found under Appearance > Widgets. Detail about every widget is given below.
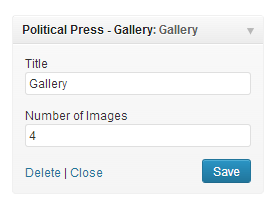
8.1.1 Political Press - Gallery Widget
This widget displays gallery images in a slider.

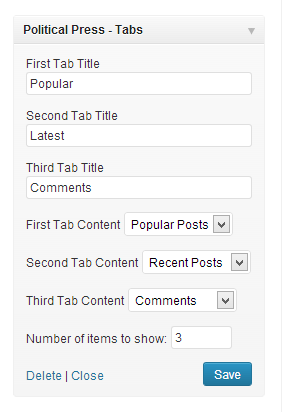
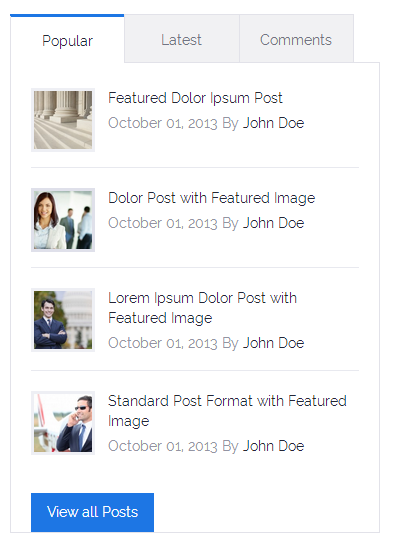
8.1.2 Political Press - Tabs Widget
This widget displays Popular Posts, Recent POsts and Recent comments in sidebar.
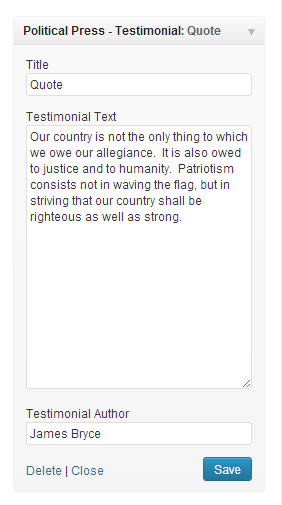
8.1.3 Political Press - Testimonial Widget
This widget displays a testimonial.

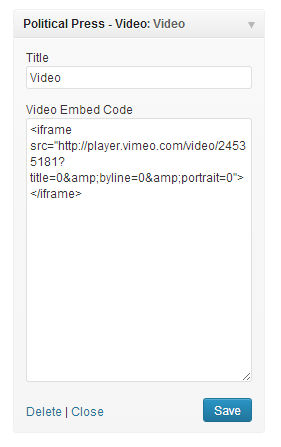
8.1.4 Political Press - Video Widget
This widget displays a video based on provided embed code.
8.1.5 Twitter Tweets:
If you want twitter to use in footer or sidebar widgets, then you need to install Following plugin
- Display Tweets https://wordpress.org/plugins/quick-and-easy-tweets/
It is a very simple and easy to use Twitter feed plugin. It allows you to display your tweets.
Follow the steps
a) installing plugin
b) Activate Plugin
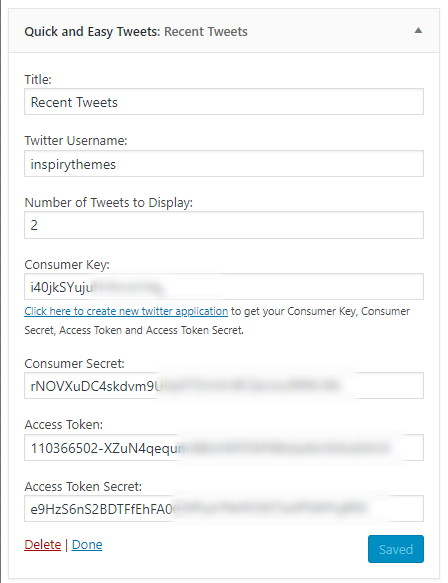
After activating plugin you can find a new widget Quick and Easy Tweets in Dashboard >> Appearance >> Widgets
Twitter's v1.1 API requires authentication. For this you need to register an application here.
After registering application , you need to configure twitter feed. Check following screenshot
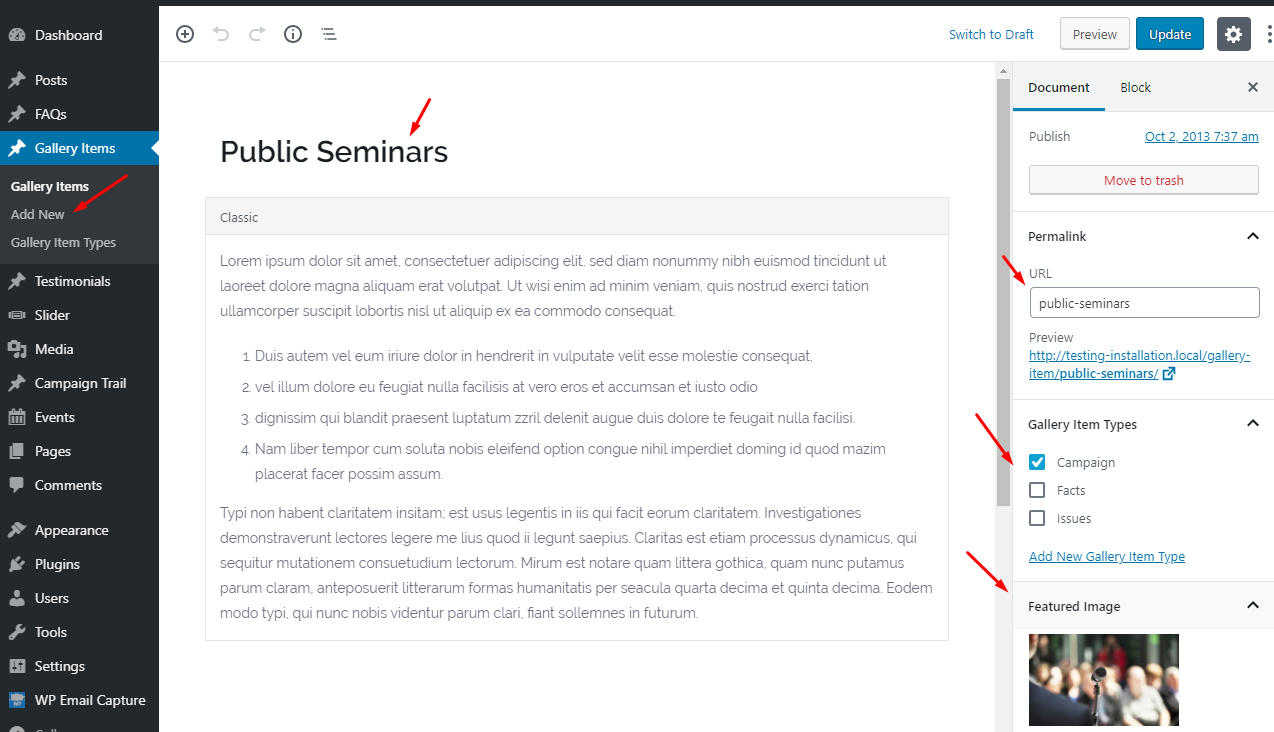
8.2 Gallery Management:
Political Press theme provide gallery custom post type to manage galleries. You can add multiple galleries and categorize them easily. To add new gallery go to Galleries > Add New and provide information in available fields. You can give your gallery a title and also you can provide detail about that gallery in editor. On the right side, provide Category for the gallery and featured image. After editor you can see metabox where you can upload multiple images to use in this gallery. Featured image is necessary because on galleries listing page feature image will be shown. On gallery single page all images provided in metabox will be shown in slider and also in lightbox after clicking on them.
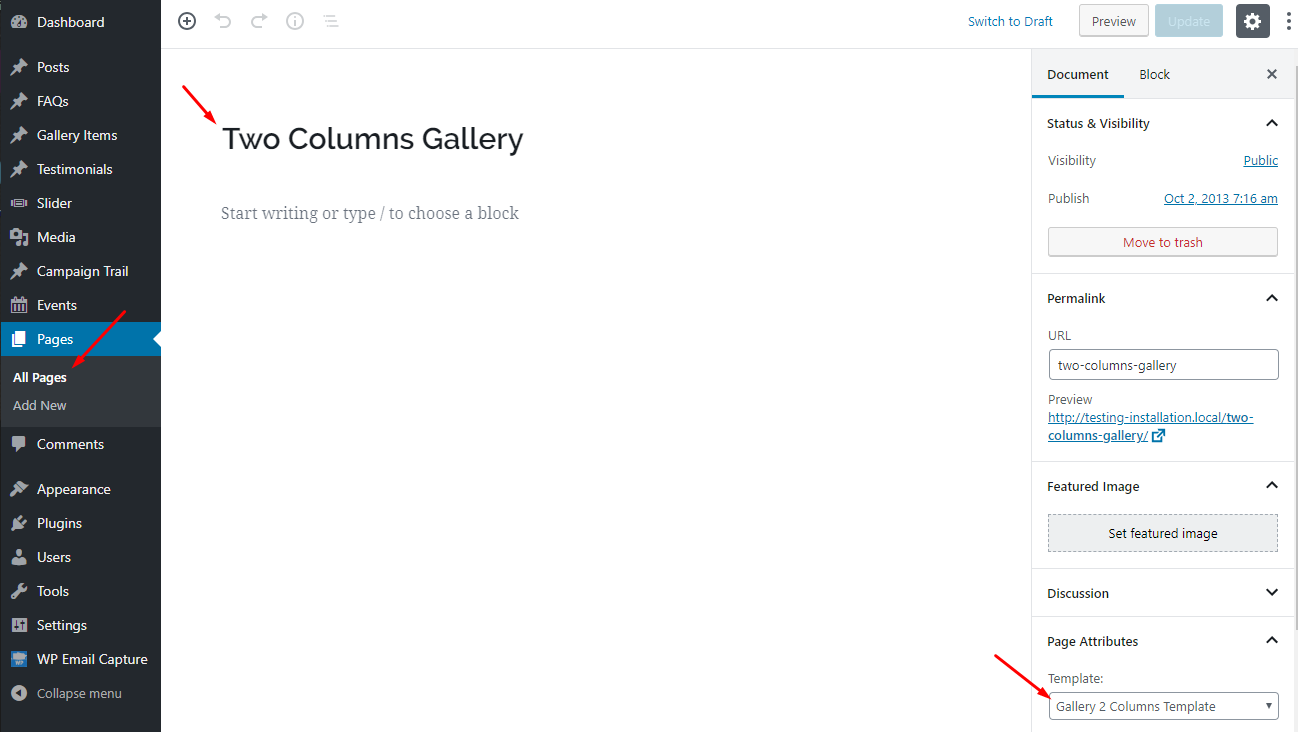
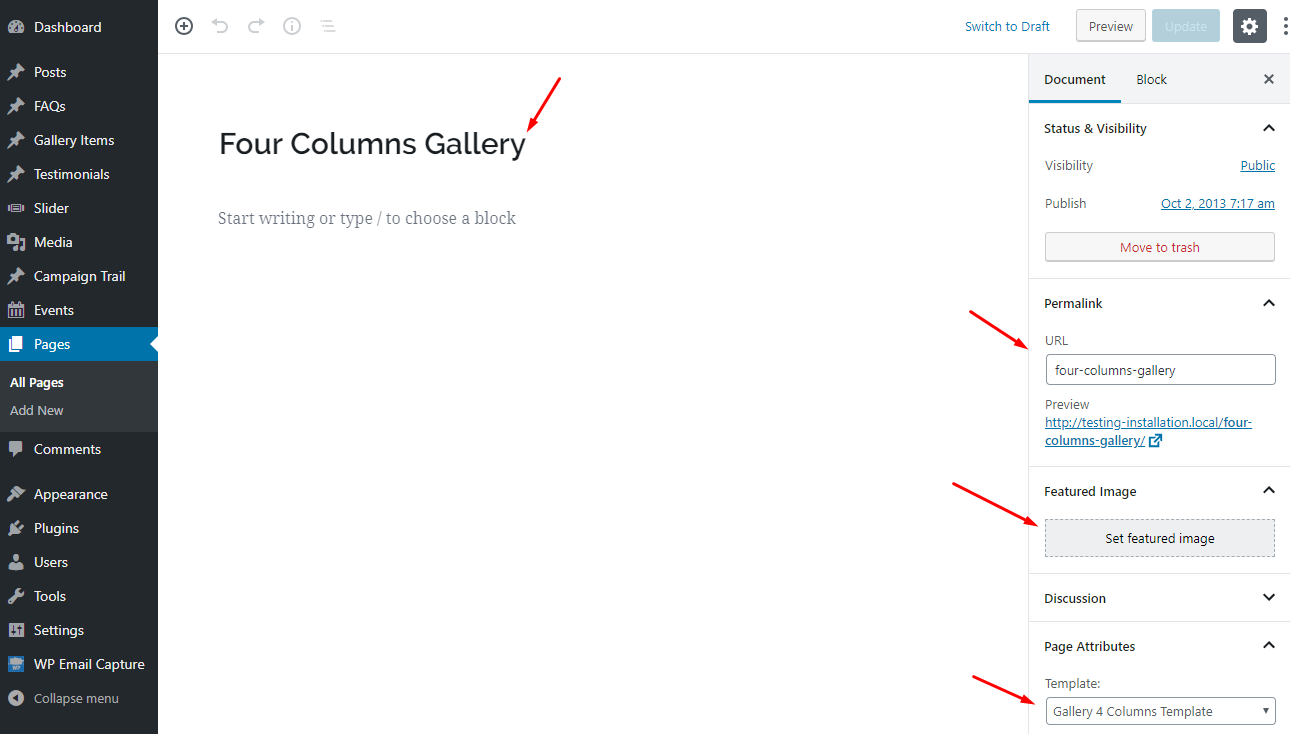
Gallery Listing Templates
There are three pages templates available for gallery listing pages. You can setup gallery listing page using those templates. Following screen shots will guide you to setting up using each template.
Two Column Gallery Listing Template
Three Column Gallery Listing Template
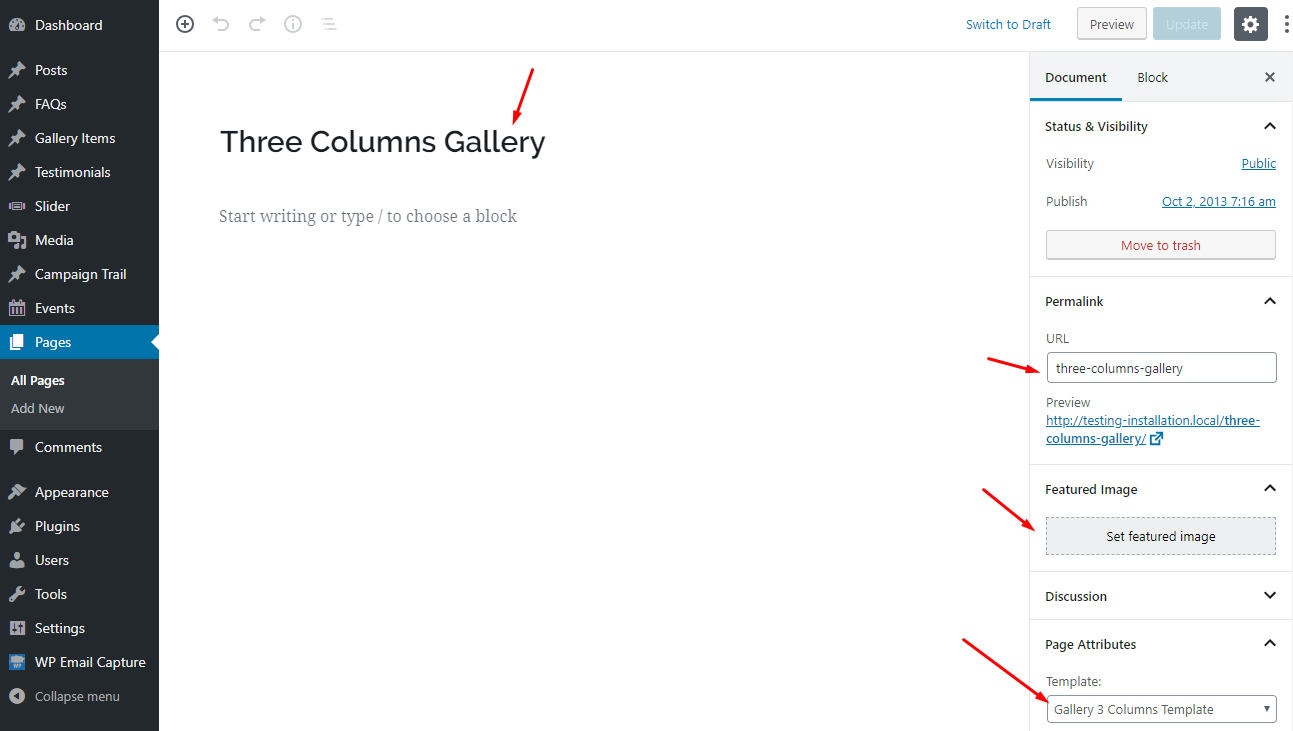
Four Column Gallery Listing Template
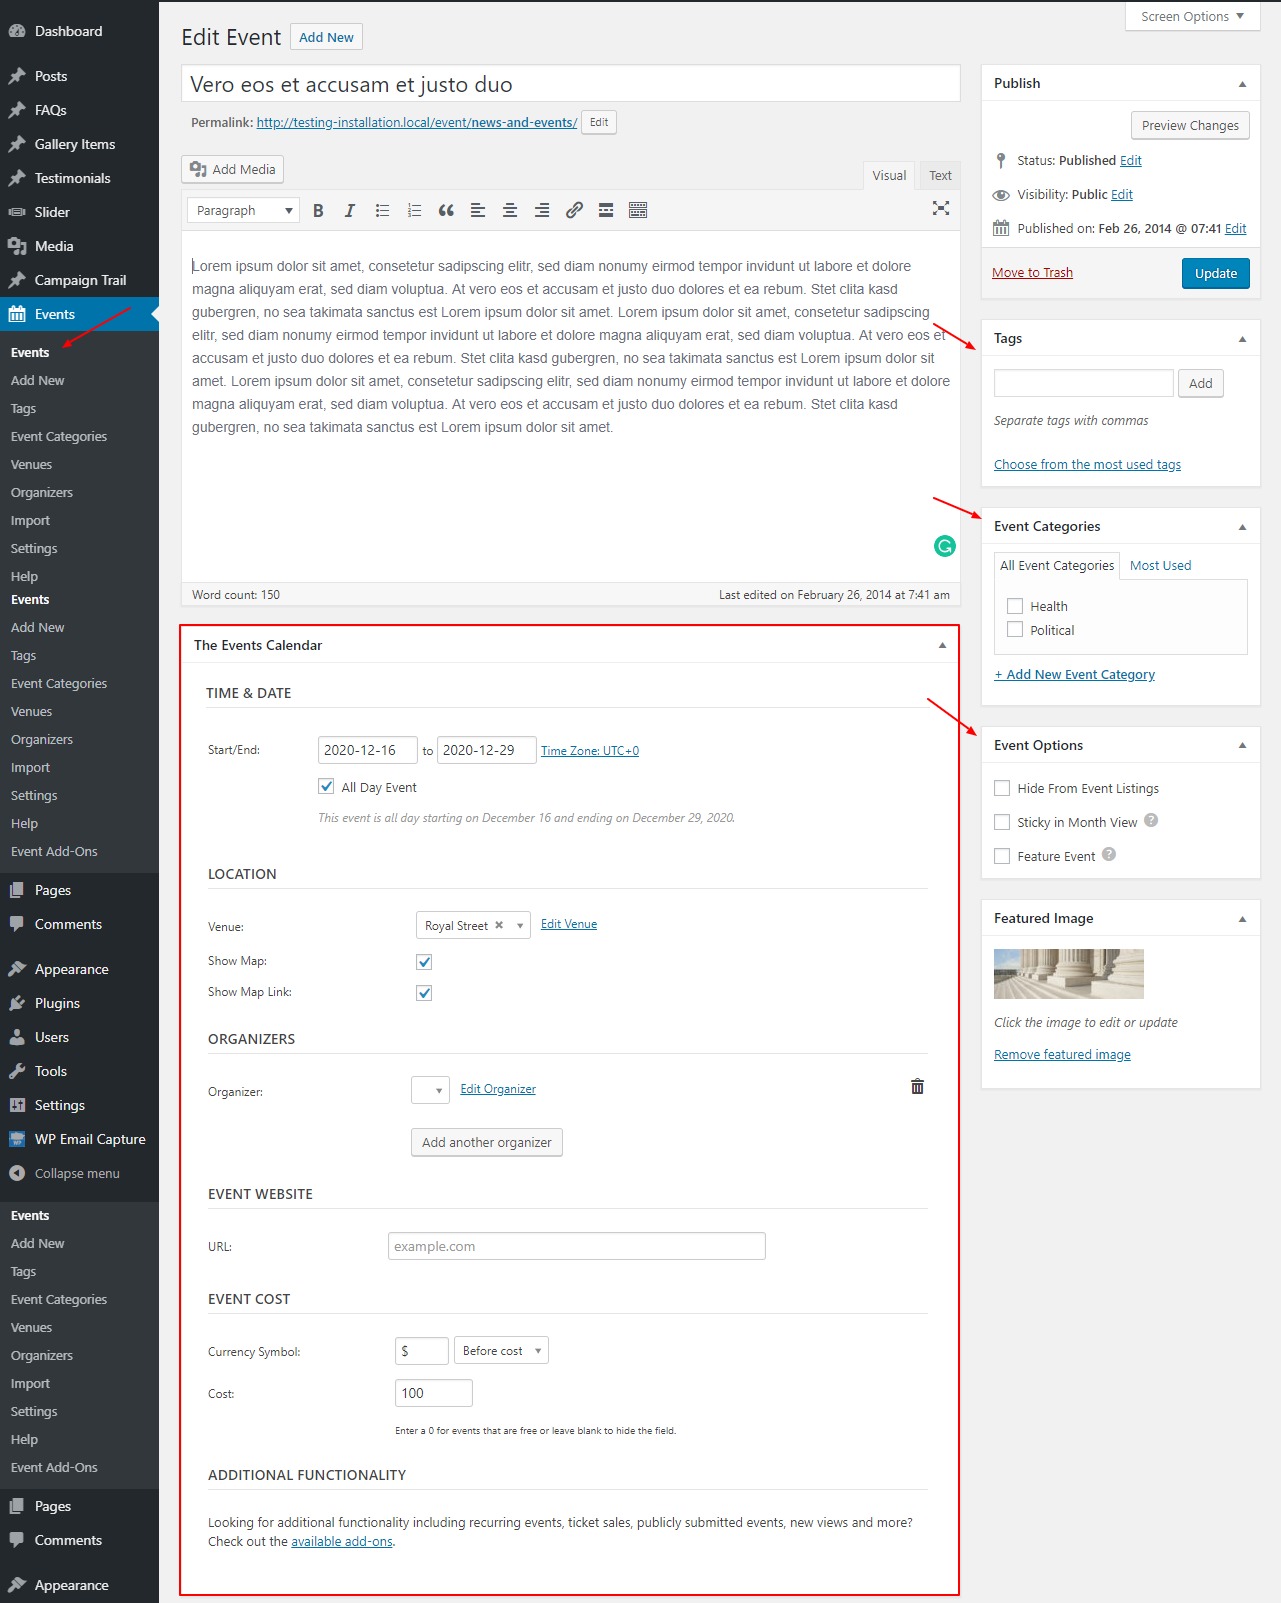
8.3 Events Calendar:
Events Calendar is one of the main features of this theme. It is based on a plugin named 'The Events Calendar'. Install this plugin from WordPress plugin directory or from given notice about Install Recommended Plugins. After installing the plugin activate it from 'plugins'. You can see Events option in left option bar after activating the plugin.
To add new event, click on 'Events' option on the left and then click 'add new' option. Provide all the required information to your event. All the options are self explanatory.
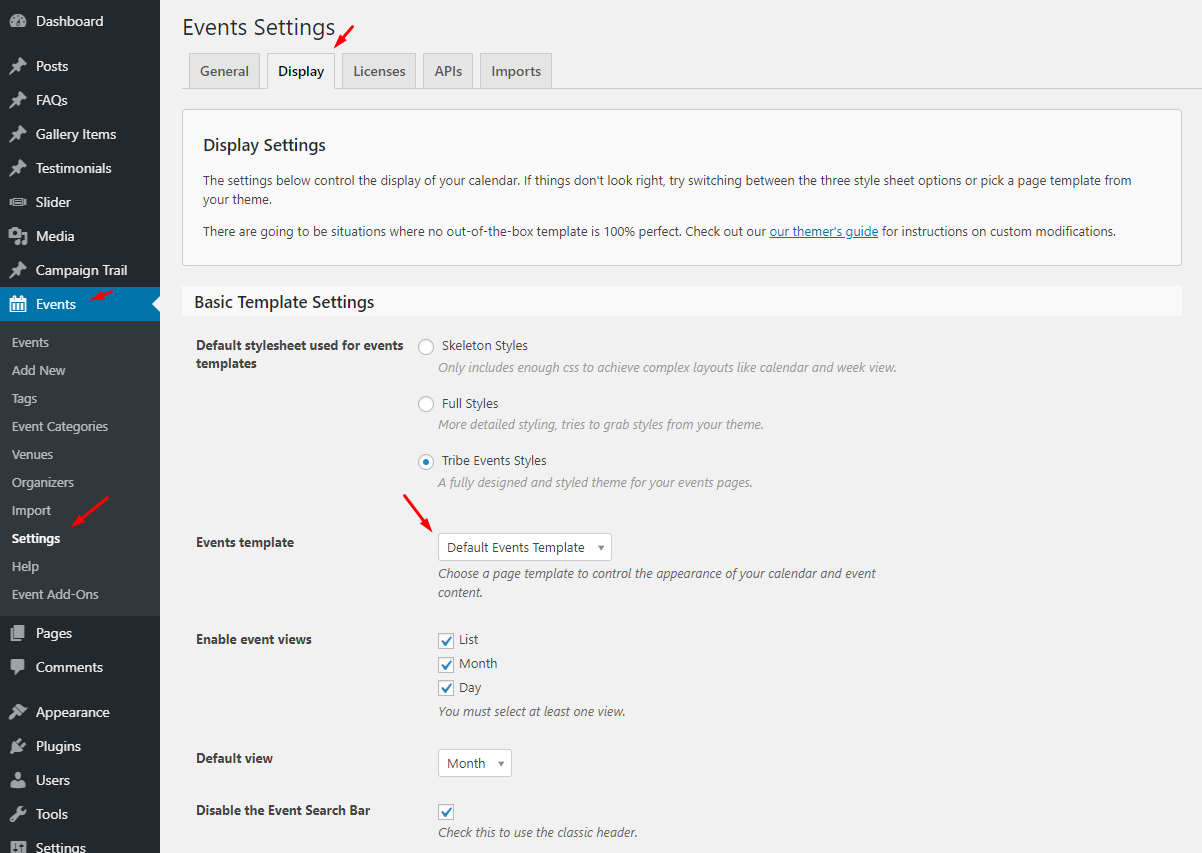
To display your events page properly you have to make a change in its plugin settings. Goto Events > Settings. You can manage all calendar related options from the setting page. Go to Display tab and go to 'Event template' option and select 'Default Events Template'. Helping screenshot is given below.
J) Short codes
The theme comes pre-packed with a number of short codes allowing you to add styled content to your site with little effort.
9.1 Columns
Columns shortcode is easy way to make columns in your page or post. All short codes related to columns and usage of these codes is mentioned below.
                    [columns]
                    [one_half][/one_half]
                    [one_half][/one_half]
                    [/columns]

                    [columns]
                    [one_third][/one_third]
                    [one_third][/one_third]
                    [one_third][/one_third]
                    [/columns]

                    [columns]
                    [one_fourth][/one_fourth]
                    [one_fourth][/one_fourth]
                    [one_fourth][/one_fourth]
                    [one_fourth][/one_fourth]
                    [/columns]

                    [columns]
                    [one_sixth][/one_sixth]
                    [one_sixth][/one_sixth]
                    [one_sixth][/one_sixth]
                    [one_sixth][/one_sixth]
                    [one_sixth][/one_sixth]
                    [one_sixth][/one_sixth]
                    [/columns]

                    [columns]
                    [three_fourth][/three_fourth]
                    [one_fourth][/one_fourth]
                    [/columns]
9.2 List Styles
We have three different types of List styles in this theme. usage is mentioned below:
                    [arrow_list_one]
                    <ul><li>Your text here</li><⁄ul>
                    [/arrow_list_one]

                    [arrow_list_two]
                    <ul><li>Your text here</li><⁄ul>
                    [/arrow_list_two]

                    [arrow_list_three]
                    <ul><li>Your text here</li><⁄ul>
                    [/arrow_list_three]
9.4 Message Boxes
We have four different types of message boxes in this theme. usage is mentioned below:
                        [error]Your Note Message Her[/error]
                        [success]Your Note Message Her[/success]
                        [info]Your Note Message Her[/info]
                        [tip]Your Note Message Her[/tip]
Accordion
jQuery Accordion shortcode creates an accordion. Its usage example is given below
			[accordion]
                [accor_block title="First Accordion Item"]Some Contents[/accor_block]
                [accor_block title="Second Accordion Item"]Some Contents[/accor_block]
                [accor_block title="Third Accordion Item"]Some Contents[/accor_block]
                [/accordion]
Tabs
jQuery Tabs shortcode makes beautiful tabs in very simple way.
			[tabs titles="First Tab, Second Tab, Third Tab"]
                [tab_pane] First Tab Contents [/tab_pane]
                [tab_pane] Second Tab Contents [/tab_pane]
                [tab_pane] Third Tab Contents [/tab_pane]
                [/tabs]
Toggles
usage example is given below
			[toggles]
                [toggle_block title="First Toggle Item"]Some Contents[/toggle_block]
                [toggle_block title="Second Toggle Item"]Some Contents[/toggle_block]
                [toggle_block title="Third Toggle Item"]Some Contents[/toggle_block]
                [/toggles]
9.5 Custom Page Templates
The theme comes with few of in built custom page templates. These templates can be used on individual pages to change the display or functionality.
- Biography Template
- Contact Template
- Full Width Template
- Gallery 2 Columns Template
- Gallery 3 Columns Template
- Gallery 4 Columns Template
- Home Template
10 How to get Google Maps API Key for your website
As of June 2016, to keep Google Maps running smoothly on your website you need a special API Key. To get and setup the API Key for Google Maps please follow the instructions below.
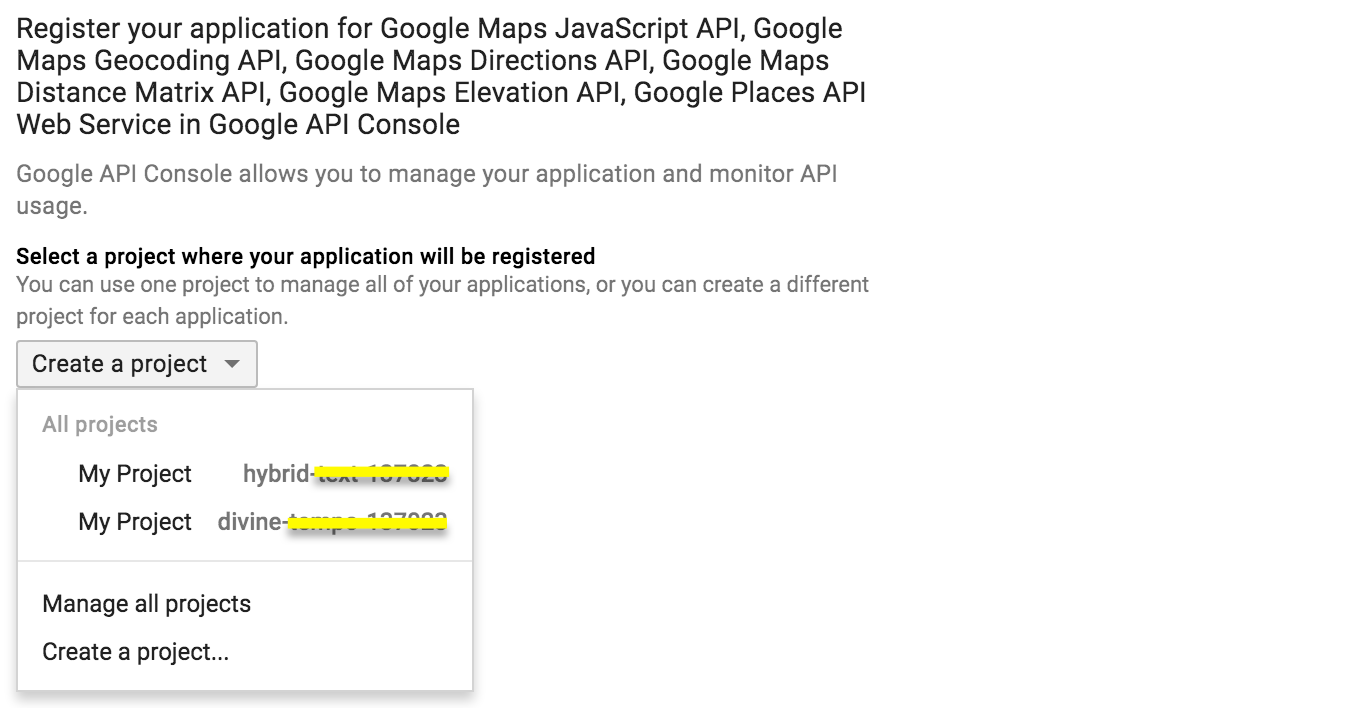
- Please go to Google API Console. and login with your google account.
- Create a new project or select an existing project then click on Continue to enable the API and any related services.
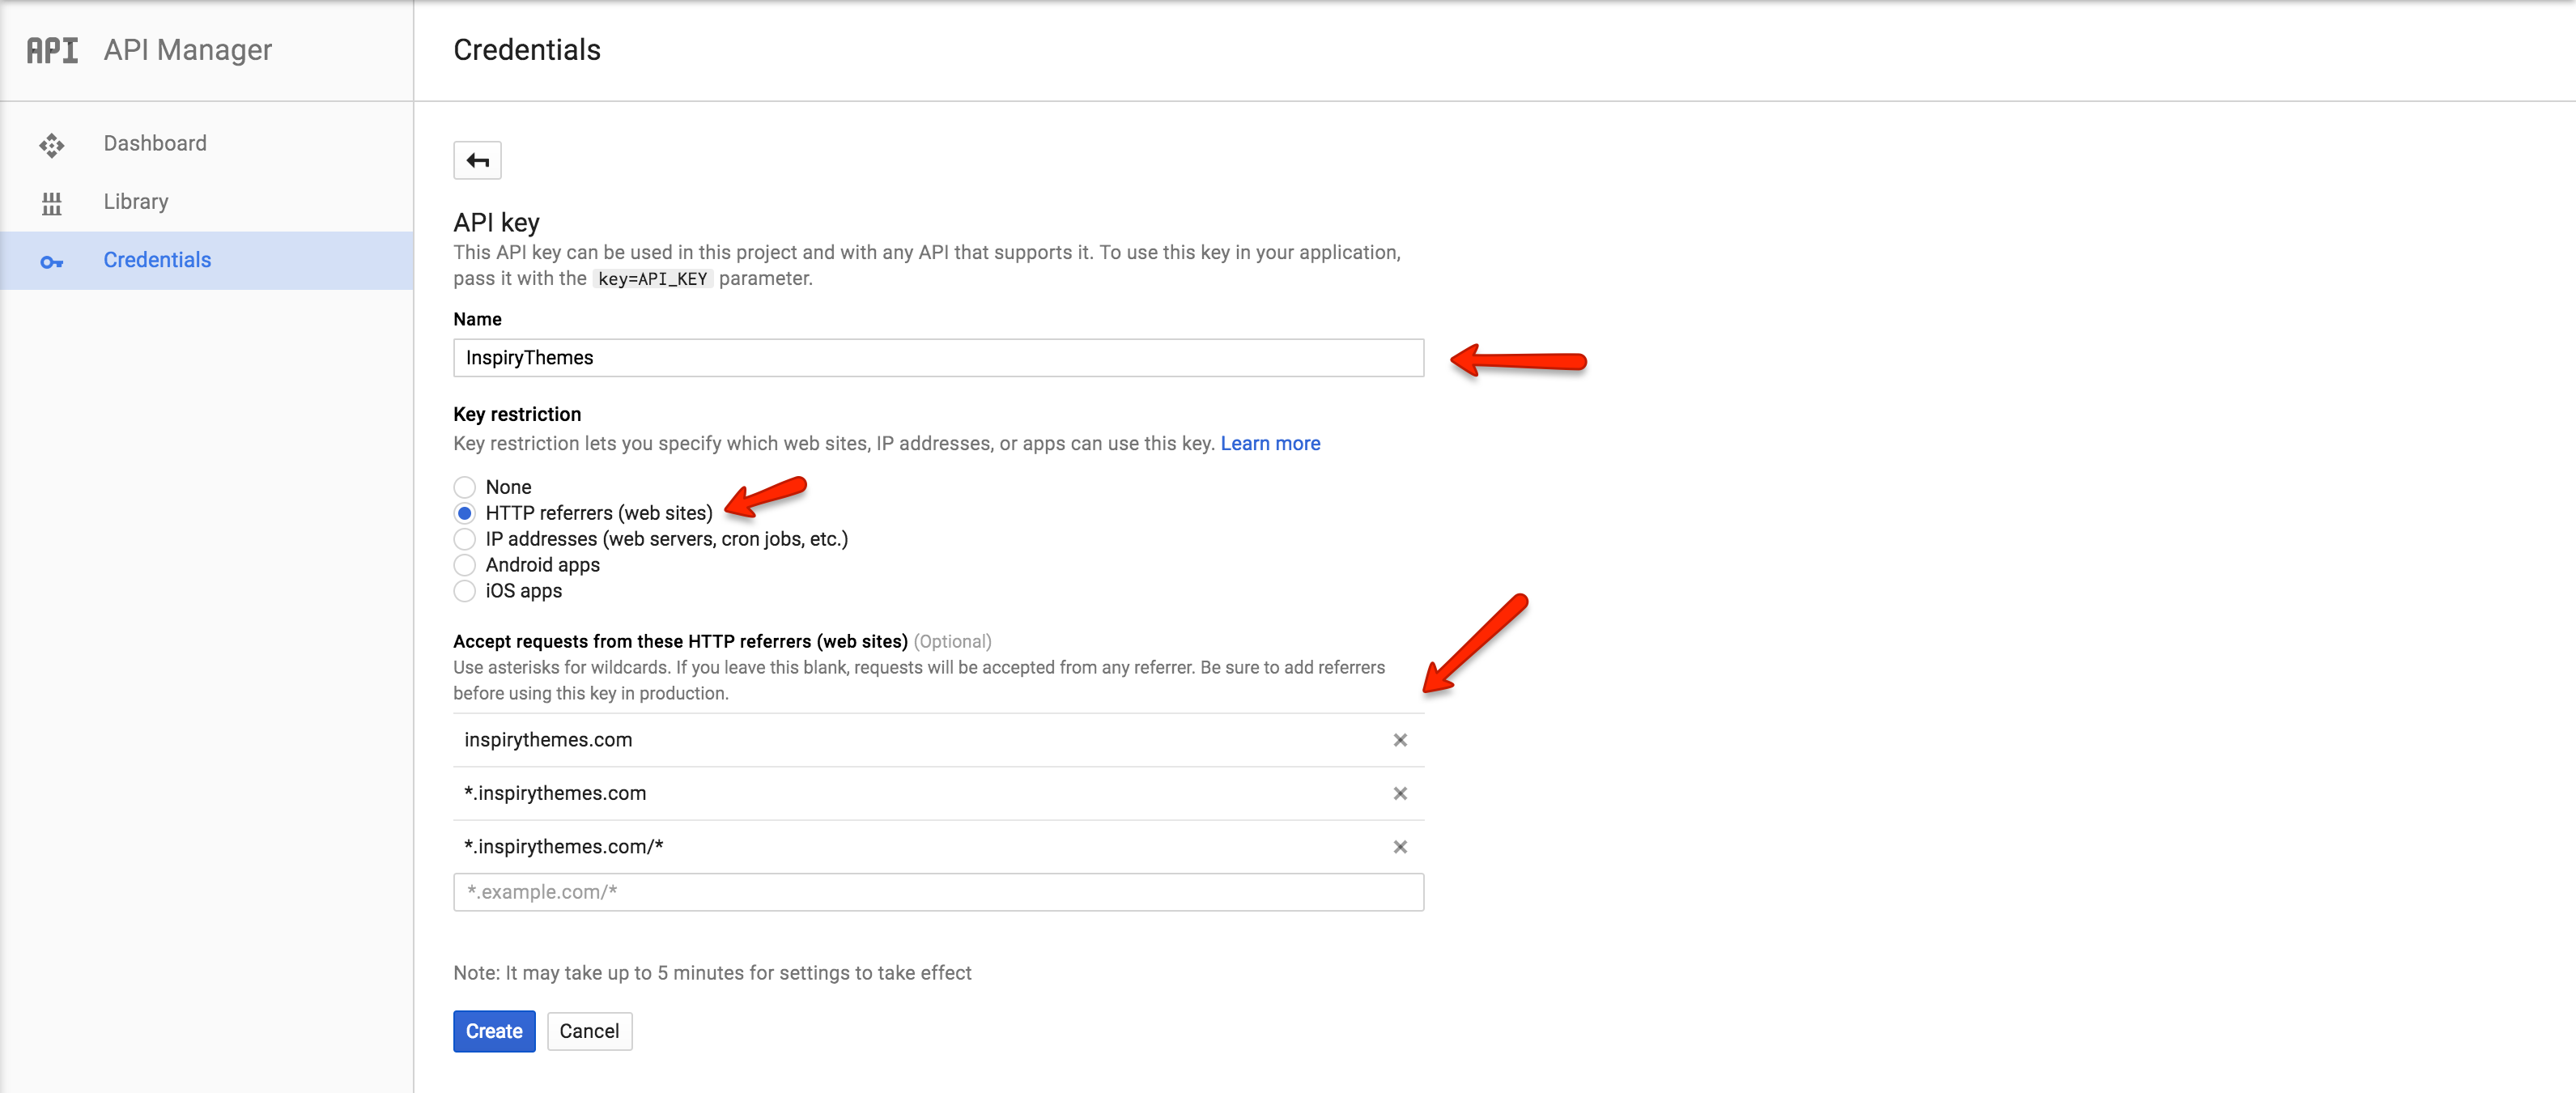
- Name your browser key and restrict it by adding your site URLs as shown in the screenshot below.
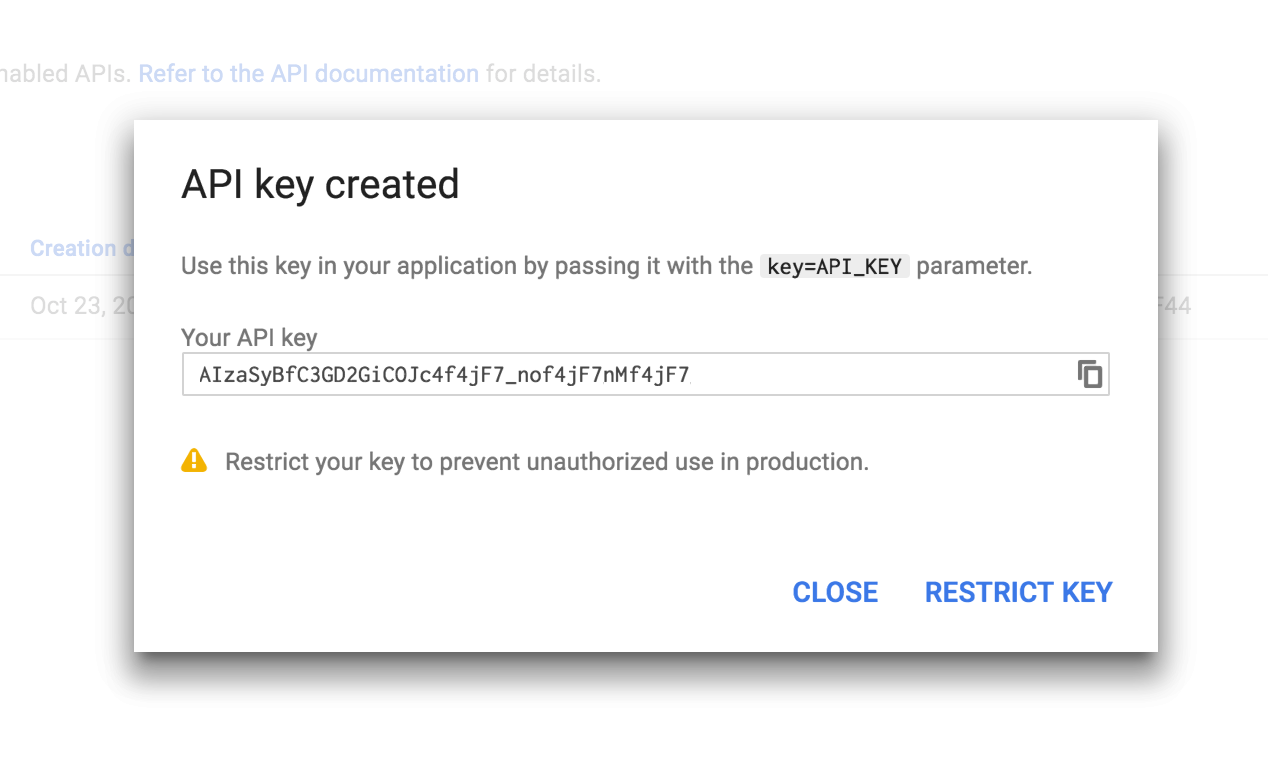
- Copy the generated Google Maps API key from the popup, you will need this to set in Customizer Settings (Dashboard > Appearance > Customize > Misc > Google Maps API Key). Click on Close button to proceed.
- By default most of the APIs are enabled but you have to enable the required APIs in order to use their related services.
K) Theme Customization
Our team offers theme Customization services based on availability and you can request a quote for your theme Customization using the the following Contact form.
Once again, thank you so much for purchasing this Theme, We will be glad to help you if you have any questions relating to this Theme. No guarantees, but We will try our best to assist. If you face any problem, feel free to post a ticket on our support site.